Articles
7 Tips for Prepping and Printing High-Quality Photos

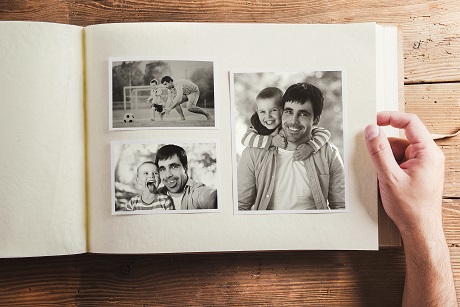 Okay, so we've been beating you over the head with it… when you sell your photography services, also include PRINTED PHOTOGRAPHY PRODUCTS! As a reminder, it is not only a courtesy to your clients, but it will help you make more money.
Now, with that said, what if you are new to the printing game? You’ve been giving out digital files for a while, and you need a few tips on how to print the best quality images for your clients.
Here’s a compilation of the top 7 tips to print (with a sale in mind) photography work:
- Calibrate Your Display: Look, nothing is going to work out for you if you don’t calibrate your display. Standardize your monitor’s color and contrast using a calibration device. By doing this, your edits will turn out exactly how you wanted them in the final print piece.
- Resolution: Even the best labs can’t make a tiny image print in large format. You have to make sure that your resolution is high enough, so you don’t leave with a pixelated print. As a rule of thumb, you’ll want to choose your ppi based on the type of printing you will be doing.
- Aspect Ratio: Make sure your photo fits the same dimensions of a lab’s print size since you don’t want a lab tech doing that for you. The best bet is to put a border around the image so that your total area matches your print size. You can always trim the border off later if you want to display it without that.
- File Type and Size: Make sure to check with the printer as to which file type and size will work for their lab. Some printers are more restrictive and can’t accept .psd files or images that are over 50 mb.
- Color profile: More often than not, you’ll be asked to submit images in RGB color format. However, some labs can only use specific formats like Pro Photo RGB or Adobe RGB. Some need it to be as specific as Adobe RGB 1998.
- Pick Your Medium: How do you want the final product to look? Matte, glossy, etc.? The type of paper you choose, not only for visual pleasure but for quality, is very important.
- Find the Right Lab for You: Near or far, you want to make sure you’re working with a lab that understands you and your work. Find a partner that you feel comfortable talking to, asking for proofs, and working together to make changes if the work isn’t perfect. After all, this will be you on a wall!
Hopefully, you’ve gleaned enough information to take a stab at your first print. If you’re feeling nervous, it’s okay! Make sure to talk with the printer ahead of time to ease your apprehensions, and ask your fellow photographers on theLoop! There are many professionals out there that love to talk about their processes. But to really up your print game, make sure to join PrintMovement.org today!
Editors Note: This article was originally posted 8/2018. It has been updated for timeliness and accuracy.