To understand William Branson III’s current approach and why it’s successful, it’s helpful to look back at where he started. Though known for distinctive studio portraits, Branson, M.Photog.Cr., actually began his career more than 40 years ago photographing outside. The idea wasn’t to skimp on the fundamentals. Rather, Branson wanted to build up his expertise one step at a time, mastering the fine points of outdoor lighting by learning to control the natural light and create ideal lighting situations at different times of day. He also studied posing, expression, and the body language that can communicate so much in a portrait.
When Branson felt ready to venture into the studio, he dove into lessons on studio lighting, learning from traditional portrait icons including Phillip Stewart Charis. In the 1980s and 1990s he did a mix of indoor and outdoor portraits before making the switch to exclusive indoor work in the late ’90s.
 View Gallery
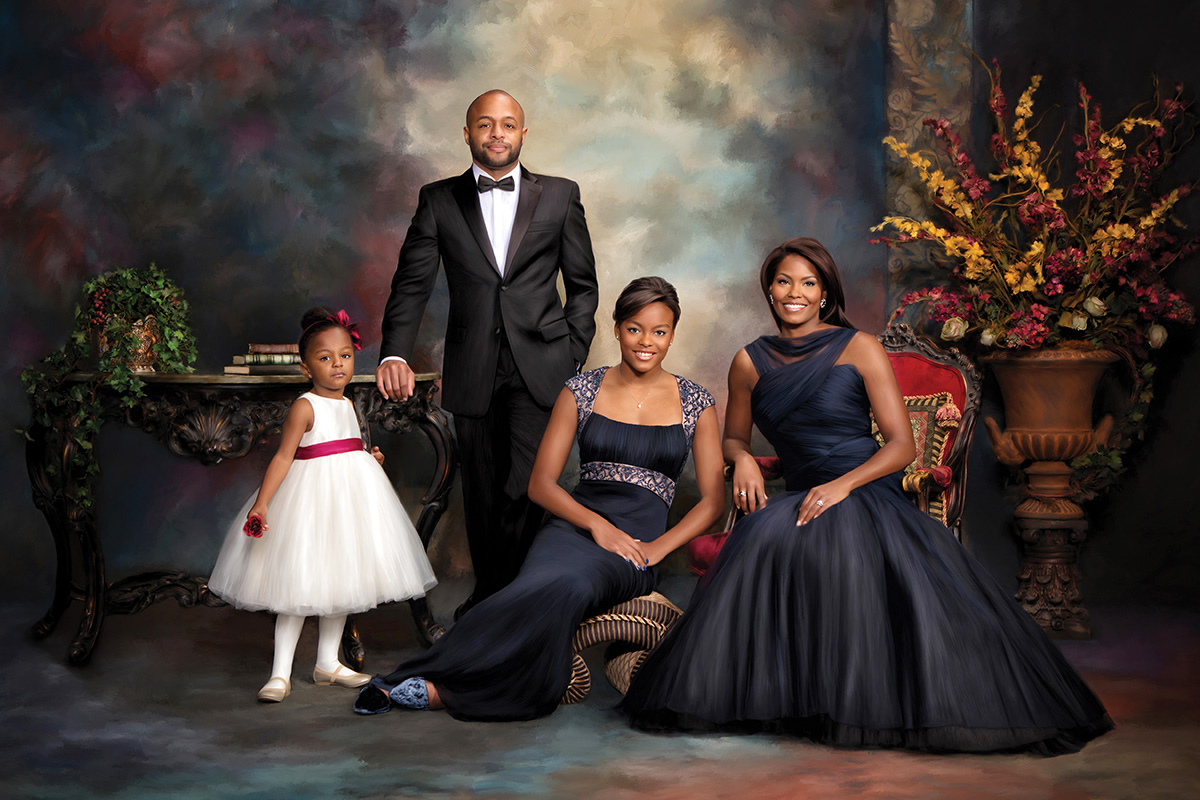
A devotee of the old masters style of painted portraiture, Branson leveraged his background in posing and lighting fundamentals to create an updated traditional style that lent itself to digital painting. He also kept his lighting setups as simple and natural as possible, using just a main light, a fill light, and a hair light. The real differentiator was hand painting the images in Corel Painter with a consistent approach to the light and shadows so that every composition demonstrated the best combination of photo realism and painted artistry.
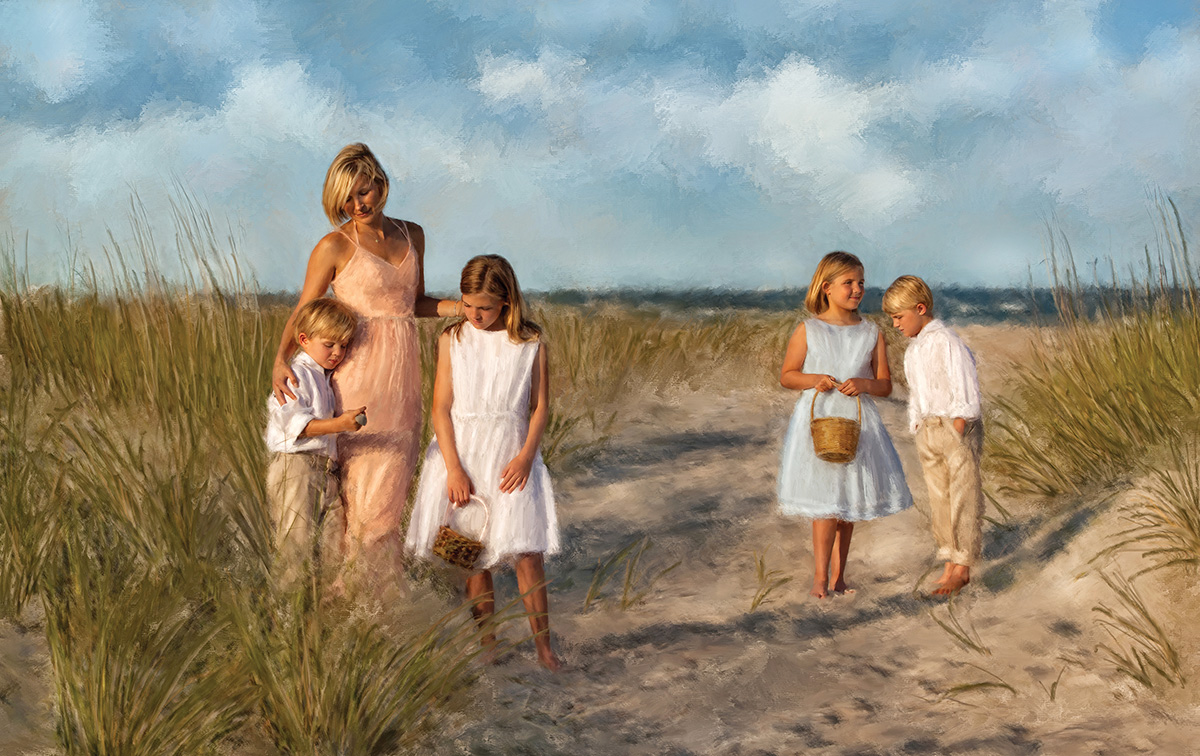
Last year, when Branson decided to close his long-standing North Carolina studio to move closer to family in Tennessee, he again transitioned, this time bringing his formal portrait techniques back outside. The new approach combines today’s popular casual style with a fundamentally sound approach to lighting, posing, composition, and the careful addition of digital painting.

Studio-quality Light Outside
When Branson photographed outdoor portraits back in the ’70s, he focused on using the environment to control available light. Aside from scheduling sessions in the morning and late afternoons to avoid harsh overhead light, he mastered filtering and shading techniques using natural features.
Today, lighting technology has evolved to where Branson can recreate a studio lighting look while working outside. The method takes advantage of the pleasing qualities of natural light while augmenting the composition with supplemental light to produce a more flattering portrait. Branson typically works with a main light and a fill light; the main shines at the same approximate angle as the sun while the fill adds a pop of light under the eyes and illuminates the shadow side.
“I’m not fighting with the available light, just adding to it,” Branson says. “By adding to it, I can create a more three-dimensional light instead of the flat light that is often available.”


Whether you’re inside or outside, it’s important to know how to create the right light ratios, says Branson, who favors a 3:1 ratio for most of his portraits. He advocates metering all scenes and understanding f-stops and power output to get the most consistent results. “I don’t wing it,” he says. “I literally adjust each light outside to get the same kind of light I’d get in the studio.”
To create his favored lighting ratio outside, Branson typically looks for an overhang or the edge of an object that can block or diffuse the sunlight falling on his subject. For example, when photographing outside near a wooded area, he likes to set up along the edge of the woods and use the line of trees to block and control the light, employing the tree canopy to modify the angled sunlight shining on his subjects. He photographs looking down the line of trees, angling his subjects’ bodies so the light shines across them and forms shadows on the far side. Using a reflector or a bare bulb light, he gives a little pop to prevent a raccoon look around the eyes that’s formed when a strong light source shines down on a subject’s face. The main light augments the available light source and controls how much light falls on the background. The main can also open up some shadows if necessary. Working this way, he’s able to produce soft, filtered light without the high contrast and dark shadows of direct sunlight.
If a line of trees or another pleasing backdrop isn’t available in the right place, Branson uses the same principles out in the open, adjusting the lights to supplement that natural light and provide the right amount of dimension. The technique in these more open situations is to avoid shooting at midday, when the sun is directly overhead, and to make sure the subjects aren’t looking directly toward the open sunlight.
“Every situation is different, but I never work in open sun or during the main part of the day,” he says. “Early morning or late afternoon are best because the sun is my primary light source, which I need to come at an angle so I can control it better and use those angles to create depth.”
The Best Light Modifier
What makes Branson’s portraiture distinctive is the meticulous painting process that takes the photographic capture to the next level. The painting isn’t corrective; it doesn’t hide flaws in the capture or fix a sloppy exposure. The painting is an augmentation, turning well-lit, well-composed portraits into heirloom wall art.
Branson builds his portraits from different images captured during a session and combined in Adobe Photoshop to create the ideal composition. After a portrait session, he sits down with the client and selects different elements—best body pose, expression, placement of hands—and then builds the image, fully retouching and prepping it in Photoshop before exporting it to Corel Painter.
To maximize his options, he captures several images for contrast so that when he starts painting, he’s working from the light of several images. This technique allows him to paint in layers and add depth to the portrait. He pays particular attention to the edges of the paint and how those edges are blended for a smooth yet realistic look.
Once he’s finished painting, Branson flattens the file and sends it back into Photoshop for additional retouching to enhance tone and control light in the background. “When you look at a painted portrait in a museum by a master like Rembrandt, for example, you can see the direction of the light and areas of light and dark based on where the light is coming from,” Branson explains. “So I tone down areas of the composition and light areas after the painting process to be consistent with how the image has been lit. At that point, I’m forcing the viewer’s eyes to go where I want them to go in the portrait. As an artist, that’s your job; you are directing the viewers’ eyes to go where you want them to go, and the first place should be the face of the subject.”

Above and Beyond
“If you want to take your work to the next level, then you have to be able to see the difference,” says Branson.
To gain this insight, there are no shortcuts. Branson urges photographers to learn studio lighting. Learn posing. Learn exposure and composition. “Take the time to learn how to do things correctly, and then repeat them until you’re so used to them that it’s like breathing,” he says.
In particular, Branson recommends taking advantage of the myriad opportunities to study with some of today’s true masters. Go beyond YouTube videos and online classes, he says. When the opportunity allows, get in front of people, work with them, practice the methods hands on. “There’s nothing like being in the presence of someone, asking questions, and taking things in the direction you’re interested in,” he says.
When you’ve honed your skills and your vision to the point where it’s above and beyond the competition, you’ve earned the status to position yourself as an artist above and beyond the competition.
Jeff Kent is editor-at-large.


