Quick Fix: Change a Background Color
A tutorial that allows you to alter the color and maintain shadows and texture with an adjustment layer.
• February 2024 issue
Recent versions of Adobe Photoshop make selections much easier than they used to be. Here’s a quick tutorial on how to select the subject, refine the selection, invert it, and change the background color while maintaining shadows and texture with an adjustment layer.
Choose the Quick Selection tool and click on Select and Mask in the tool’s top control. In the Properties window, select Onion Skin in the View mode and a transparency level that lets you easily see your selection.
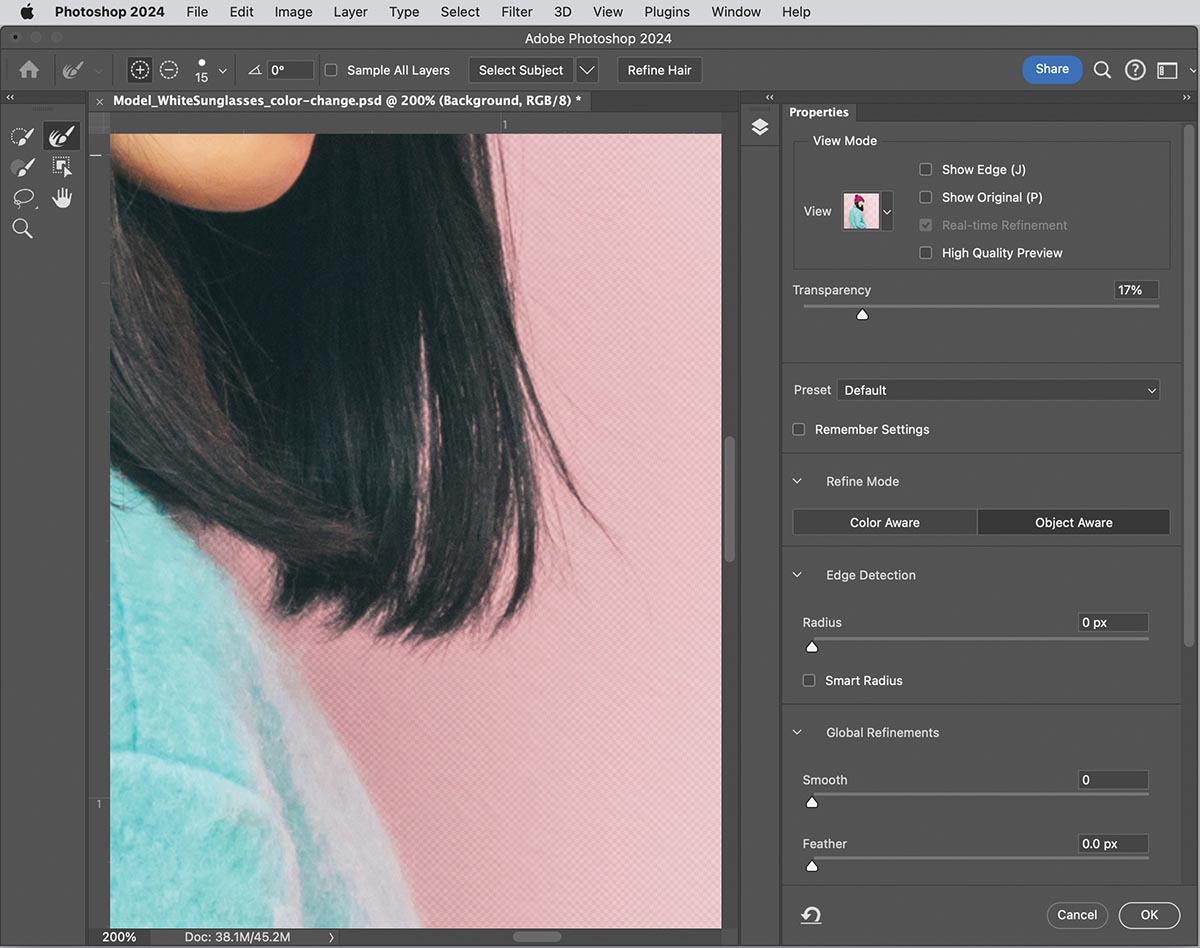
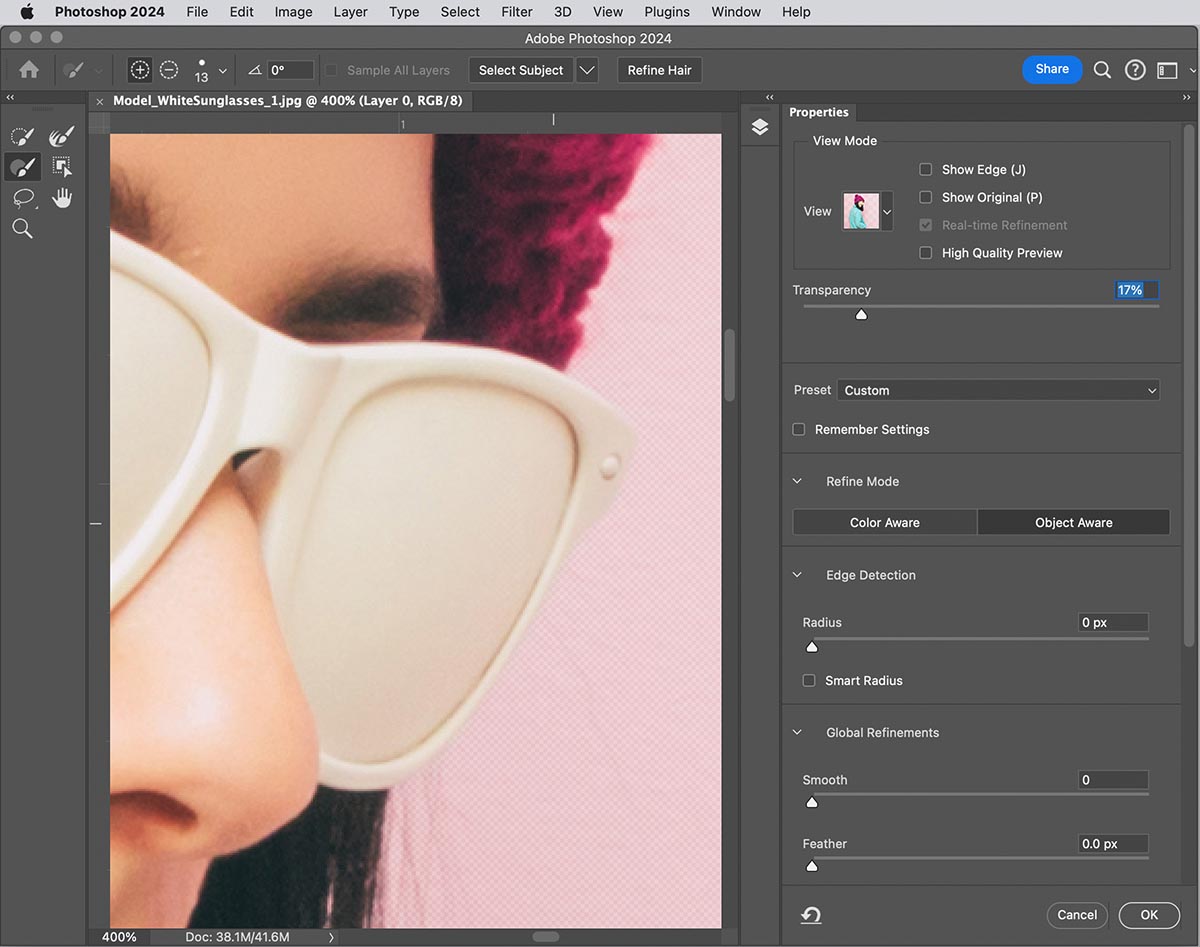
Refined selections for hair and glasses.
Drag the Quick Selection tool over the subject, being mindful of where the border of the selection could be indistinct due to similarities in color or where the background shows through the hair strands.
Choose the Refine Edge brush tool and zoom in. In this example, Color Aware refinement works best to remove the background selection from behind the hair strands. Just brush over the area where the hair and background meet. You can use Refine Hair to improve the selection.
If you have an area such as the edge of the white glasses where the selection is not distinct but the edge is a smooth line, you can switch to the Brush tool and hold down the shift key as you click along the edge, making smooth linear transitions between click points. Click OK to complete the mask selection.
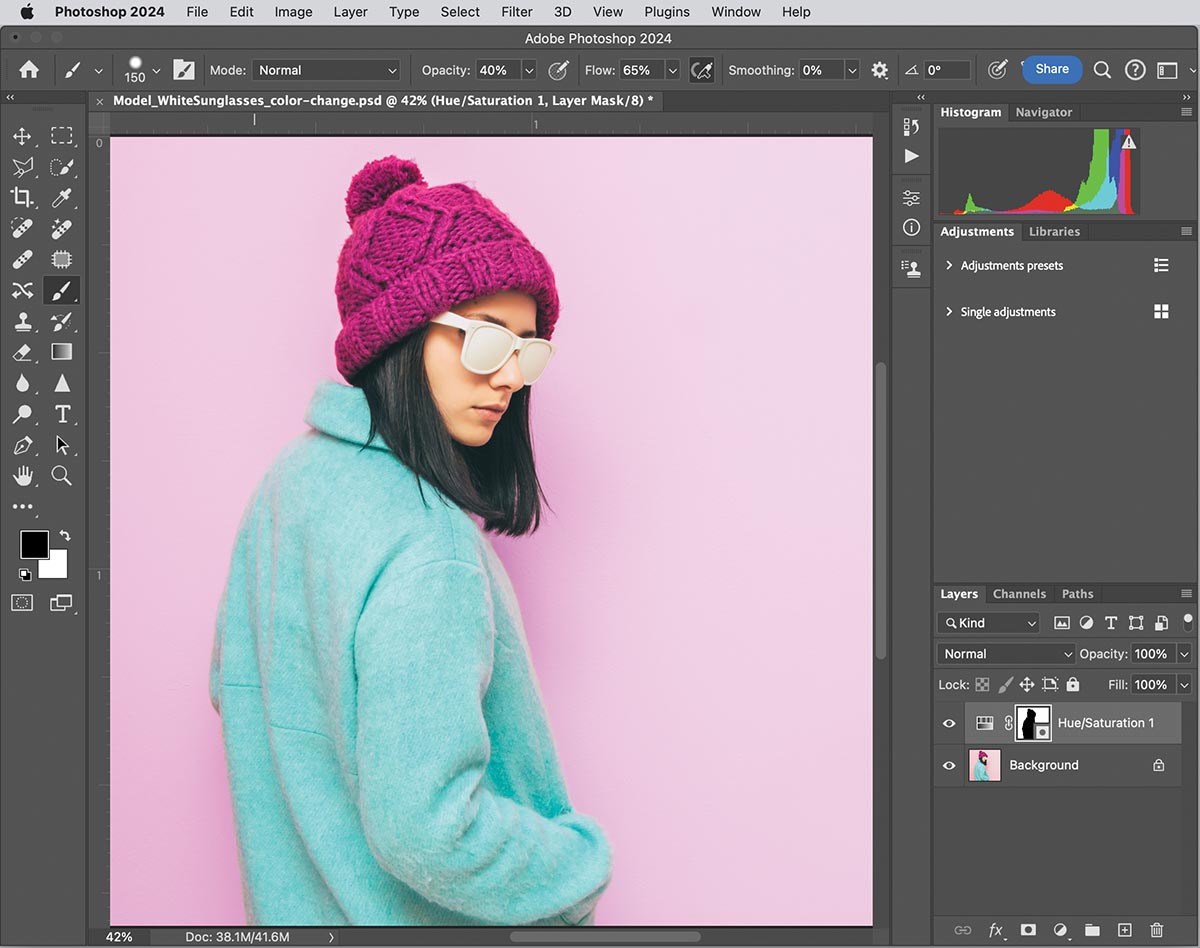
Final
Click Select > Inverse to invert the selection to the background. Click on the Adjustment Layer icon and select Hue/Saturation to add the adjustment layer above the original. Use the sliders to change the color of the background. Be aware of the reflected color from the previous background on your subject as it will require additional steps to correct if it’s too different from your new background color.
Tags: photoshop retouching
