Lighting tips: How to get the look in camera
Portrait photographer John Gress offers a lighting tutorial for portrait sessions
• October 2019 issue
I believe the most important thing we can do in studio—after being creative—is to get it right in camera. I’ve tried all kinds of Photoshop tricks, but for me nothing beats a properly lit frame. So let’s work on putting light where you want it, blocking it from where you don’t, and bouncing it where you need it.
BOUNCE
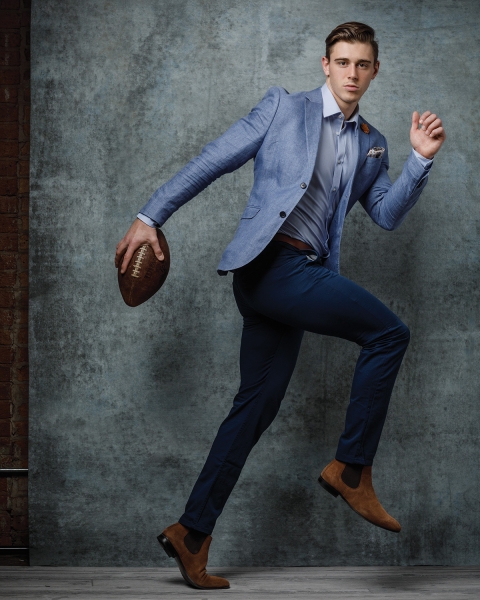
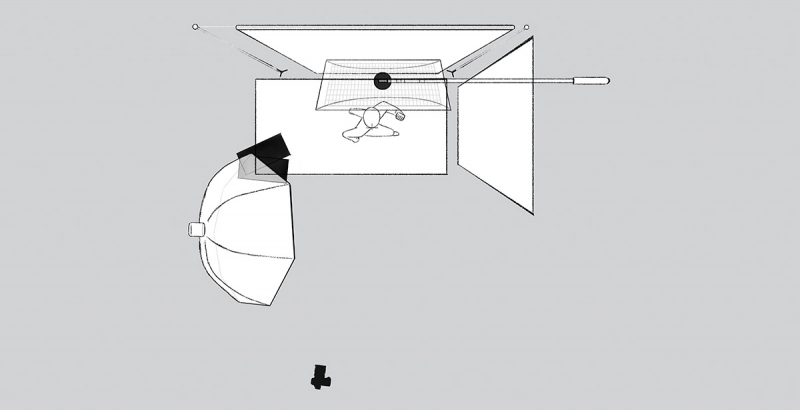
Even with the softest modifier possible, a single light source is going to give you 100% black shadows. By bouncing light back from the other side with a V-flat or anything white, you can lessen those shadows and capture your camera’s full dynamic range. If your bounce is too close, however, your image will be flat and lack contrast.
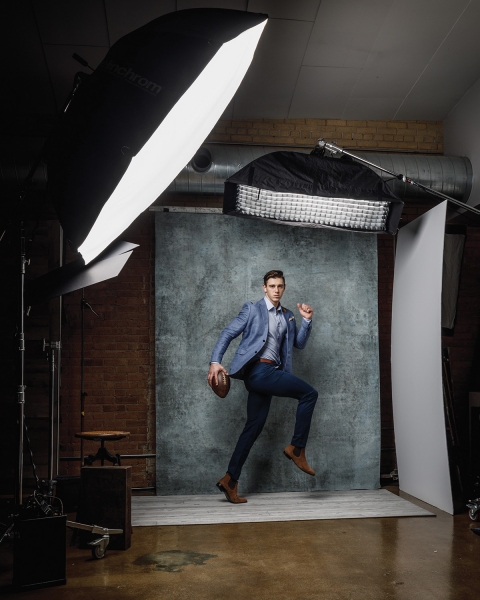
I often use a V-flat or white foam core on one side of my set and a large octabox on the other. In general, I want the light meter reading on the side of the subject’s face that’s lit by the octabox to match my camera’s exposure, and the side nearest the V-flat to measure two stops down. In the end, though, it’s all a matter of preference. I like using the V-flats because they’re easier to maneuver than larger pieces of foam core, plus they’re black on one side and white on the other.
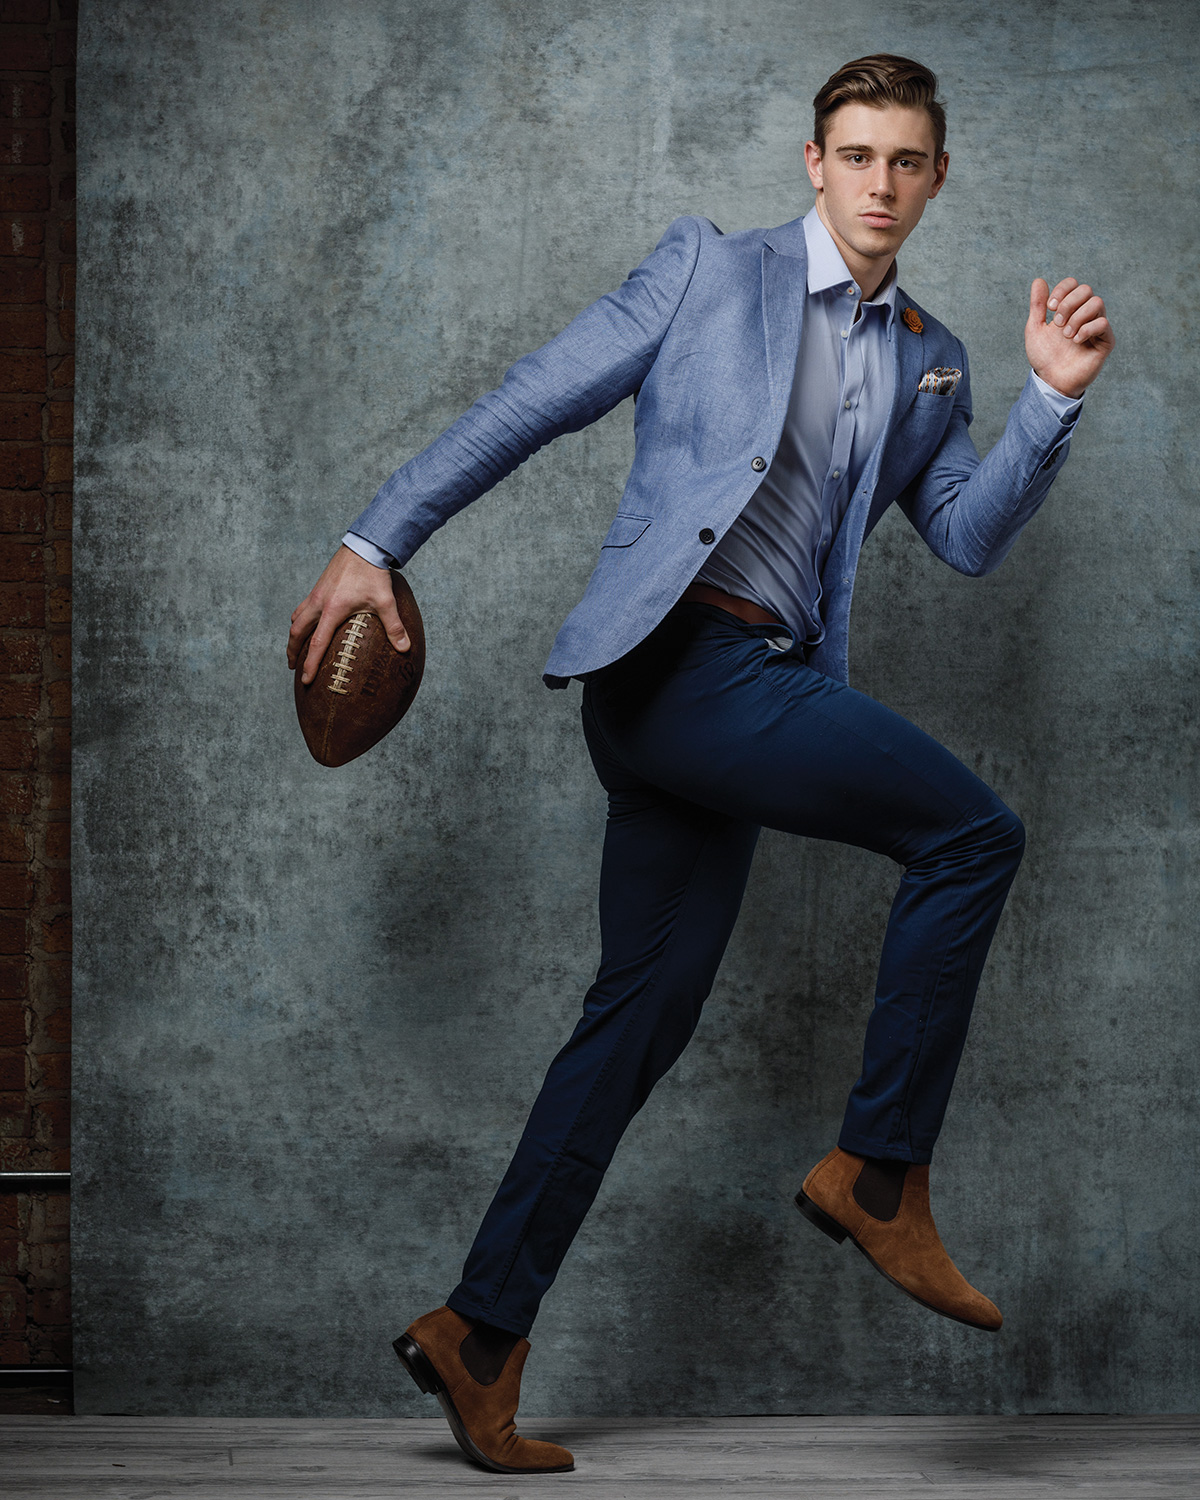
In this setup, I placed an Elinchrom 190-centimeter indirect octabox at a slightly downward angle to my left and some white foam core to my right. To further shape the light and increase the top-to-bottom gradient of the main light, I flagged the bottom of the modifier with two small pieces of black foam core. To finish the image, I added a subtle hair light in the form of a medium Chimera strip box on a boom above the model. I also employed a grid to keep this light from hitting the background.
HARD LIGHT
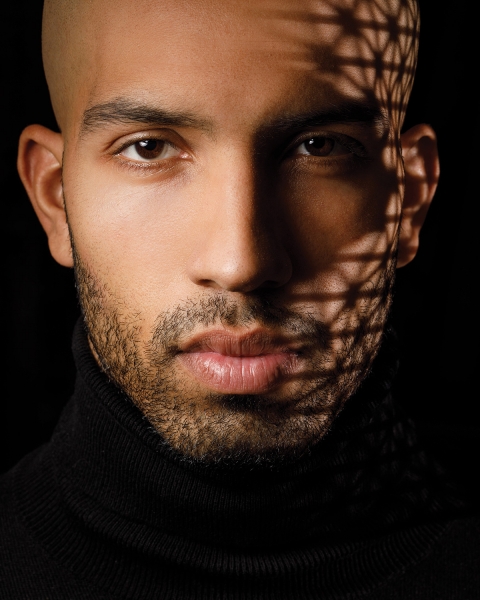
I’ve seen many images in which a pattern of shadows is projected onto someone’s face, and I used to struggle to simulate this type of lighting. Though it took a number of attempts, I finally learned how to achieve this effect to my satisfaction.
There are two ways you can attain sharply defined shadows: with a small light source far from the pattern—hard light—or with a specialty modifier that uses lenses to focus the pattern on your subject. I don’t have a lot of experience with the latter, so I’ll focus on the former.
I wanted the hardest light possible. I began with an LED light with a fresnel attachment, which worked well except for the part where I was shining the equivalent of 650 watts of light into someone’s eyes. I saw other photographers using a silver beauty dish with success, but my efforts to duplicate the technique fell short.
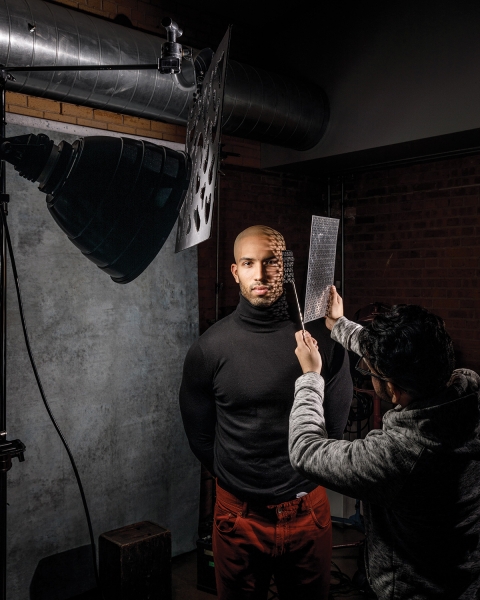
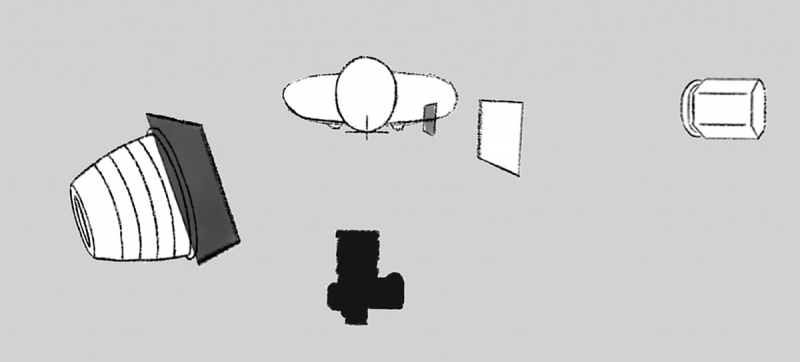
Success came in the form of a Profoto Hardbox. A Hardbox is a black metal box with an opening on one side that positions the flash head perpendicular to the subject, exposing the flash tube to them in profile. The result is a tiny light source that produces hard light.
With the Hardbox about 5 feet away from the model, David Kushnir, I was able to project a sharp pattern through a common radiator screen. In a dark room with the only light coming from the modeling light in the Hardbox, I was able to move the screen closer and further away from the subject until I saw the Union Jack-like pattern displayed across the model’s face in the way I wanted.
I lit the model from the other side using a Mola Rayo, a 15-inch silver beauty dish. You can use anything for the main light source as long as it’s small and produces contrast. The pattern would never exist if it didn’t live in the shadow produced by the main source.
The problem was that I didn’t want the pattern in the model’s nose shadow, which was created by the main light. I recalled learning how to dodge and burn in the darkroom, so I taped a piece of cinefoil to a metal straw and went to work. In this example, I asked stylist Pablo Roberto to hold the tiny flag in place. In subsequent sessions I’ve simply used a grip head to hold the straw.
I needed to add one more thing before the image was complete: a flag at the top edge of the main light so the light would fall off on the top of the model’s head, ensuring the viewer’s focus would be drawn to his eyes. Eventually I realized I could get the Hardbox look with a standard reflector, I just had to move the light a lot farther away, around 13 feet from the subject.
MOOD
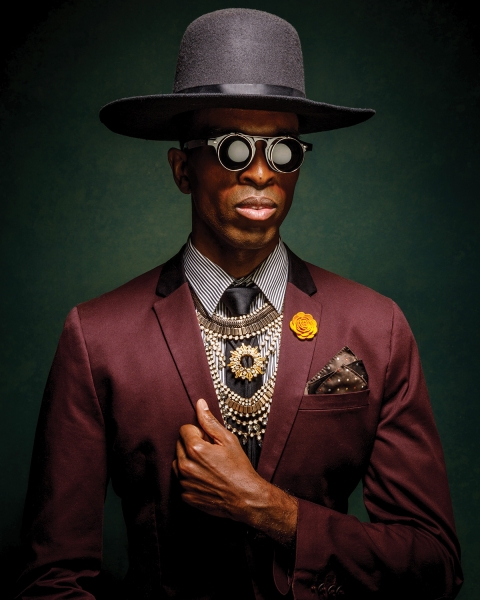
You never know where you’re going to find the next inspiration, so it’s always best to keep your eyes peeled and your mind open. A friend posted a series of photos by Jamie Morgan featuring suits and jewelry that come together in a style that follows African themes. I loved them. I shared the images with stylist Pablo Roberto, and got my model-friend Kenneth Hill on board, along with his extensive wardrobe.
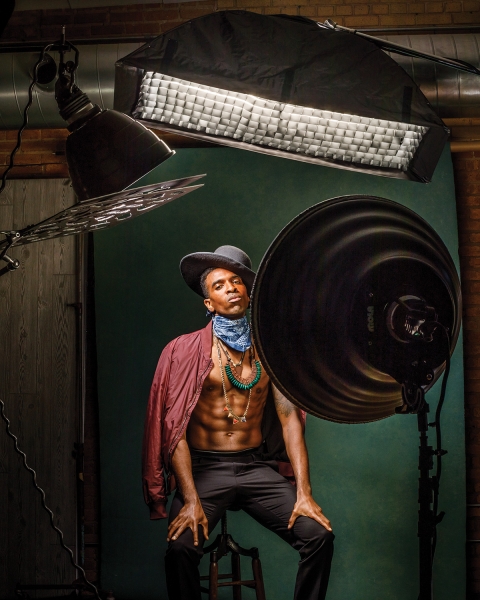
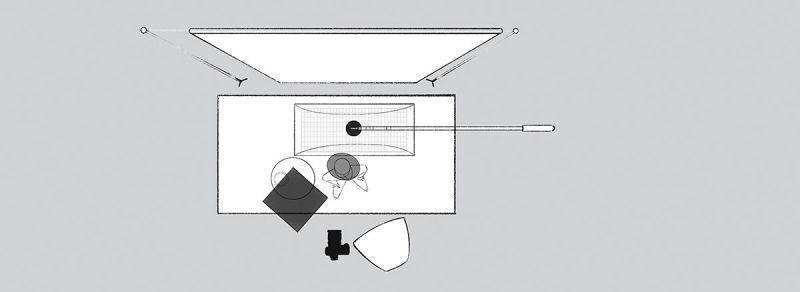
The art direction of the inspiration images was not only about the styling, it was about the mood created by the lighting. It reminded me of nightclub lighting, which is typically mounted near the ceiling. For my main light I placed a Mola Rayo just in front of the subject, high and to my left at a fairly extreme downward angle. If you don’t have access to one of these high-end reflectors, a small beauty dish or a 15-inch or so reflector will do the trick. You just need the lighting to be directional and hard. The light from this modifier measured f/11 next to the model’s face.
To further shape the light I placed a homemade cucoloris along the front edge of the modifier to cause the light to fall off on the lower part of Ken’s torso.
Because of the steep angle of the main light, the model’s facial features and hat cast shadows. I used a Mola Setti, which is a 28-inch white beauty dish, placed to my right (out of shot) to counteract this. A diffusion sock over the reflector created a large solid white circular surface reflected in the model’s glasses. The trick was to set the power level so that it preserved detail in the shadows without eliminating them altogether and killing the mood. I set the power so that the exposure from the modifier measured f/6.3 when measured under the hat. The reflection in his glasses was underexposed, so I brightened it in post.
Building on the general motivation for the shot, I used a strong hair light—really a hat light—with a gridded stripbox boomed over the model with the power set so that the exposure on the top of the hat measured f/10. I used the grid to keep it from illuminating the background from the top to the bottom. I thought the rest of the light bouncing around the room would light the background. Once everything was dialed in. I took the photo at f/10.
As much as I advocate for getting it right in camera, I’m not infallible. It turned out that I had seated the model too far from the background and didn’t notice on set how dark it was. It fixed it in post by boosting the background exposure by about a stop.
John Gress is a commercial photographer based in Chicago.
Tags: light modifiers lighting

