For photographers, light is everything, and having spot-on white balance is essential. Whether you’re shooting with ambient or artificial light sources, white balance must be managed. For years, ExpoDisc has been a go-to for managing white balance if you didn’t want to use a gray card or color chart. While gray cards are great for accurate white balance, you can’t always pause an organic flow of special moments to have someone hold a card for post-production purposes. And we all know that auto white balance is unreliable.
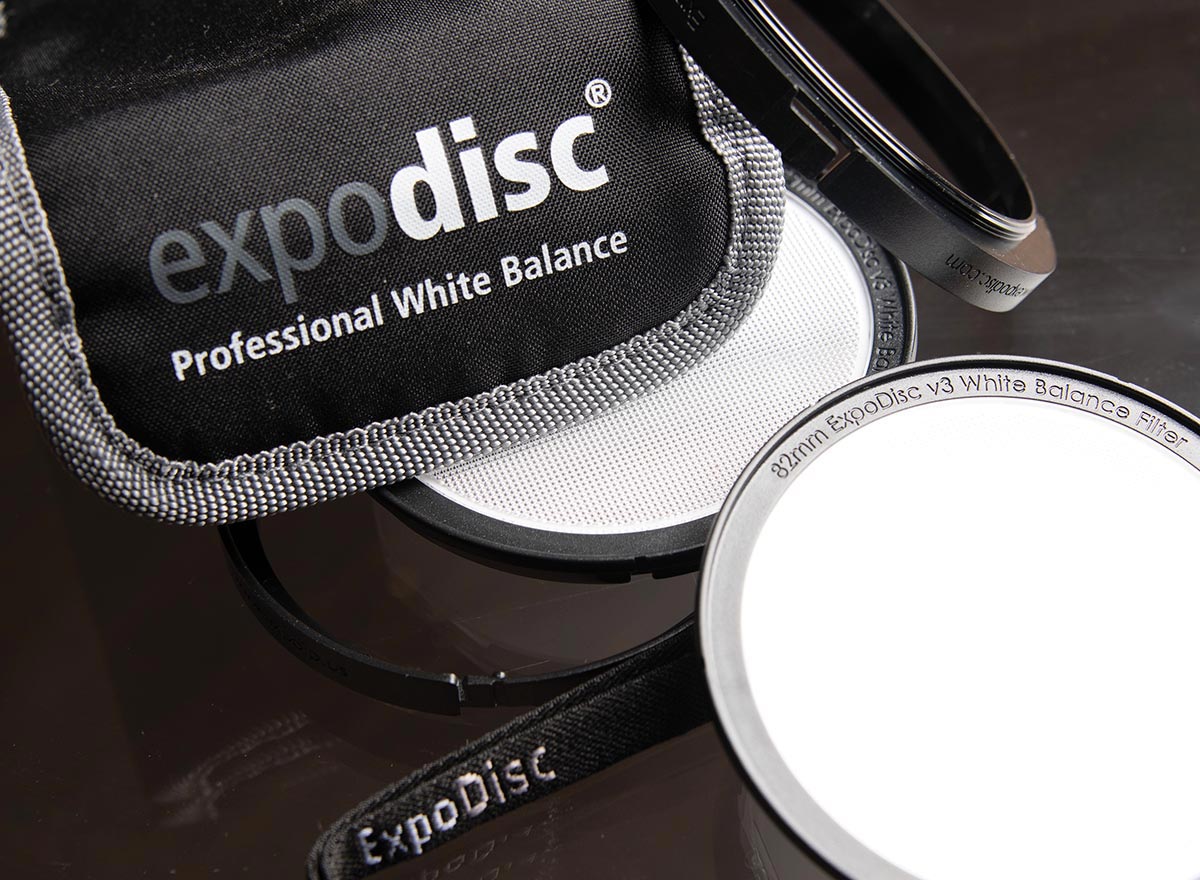
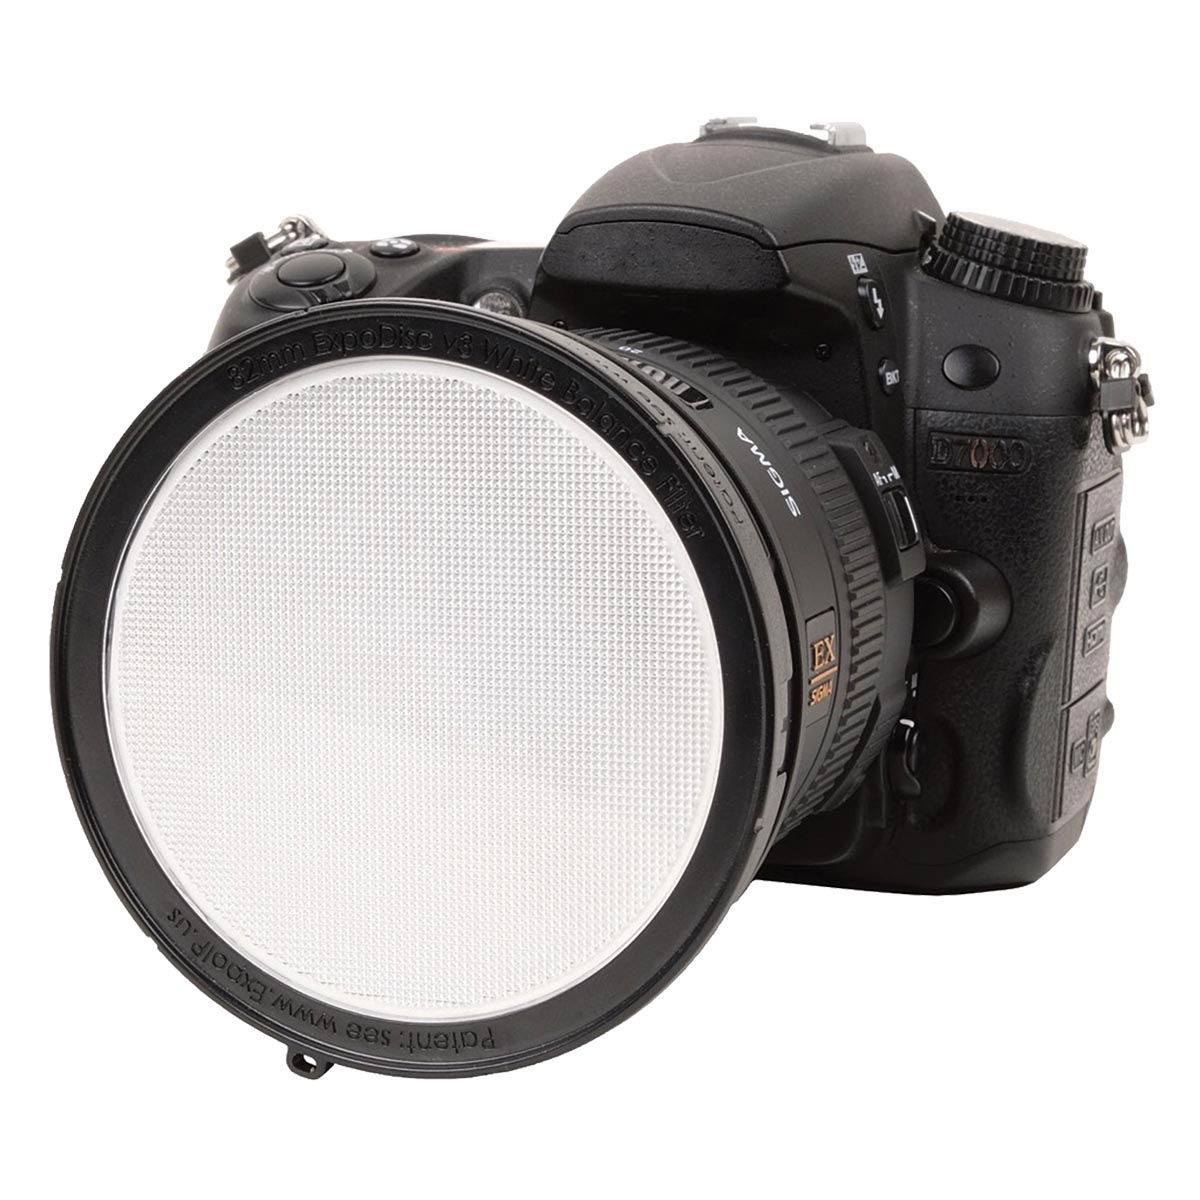
The ExpoDisc is an incident light metering tool that’s held in front of the lens while capturing an exposure. It filters the visible light spectrum entering the camera’s lens into a uniform tone. You can then use this reference image to set the camera’s custom white balance for subsequent exposures. It requires no software, and if you’d rather capture reference images and then set the white balance in post-production, that’s an option too. The ExpoDisc comes in a storage pouch and has a bayonet mount if you want to attach it to your lens.
Straight out of the camera, the exposure had a blue-toned white balance.
I corrected it in post-production with the ExpoDisc reference image I’d taken.

Using an ExpoDisc to balance light helps you achieve accurate skin tones, as seen in the final portrait.
The latest version, ExpoDisc v3, is thinner and lighter than the previous iteration, and the diffuser is made with materials that perform better into the near infrared and visible spectrum, particularly when photographing in ambient shade or window light. When you shoot through it, the resulting image is a gray-toned reference image you use to get accurate white balance in captures subsequently made in the same lighting conditions. It’s not recommended for use with direct on-camera flash.
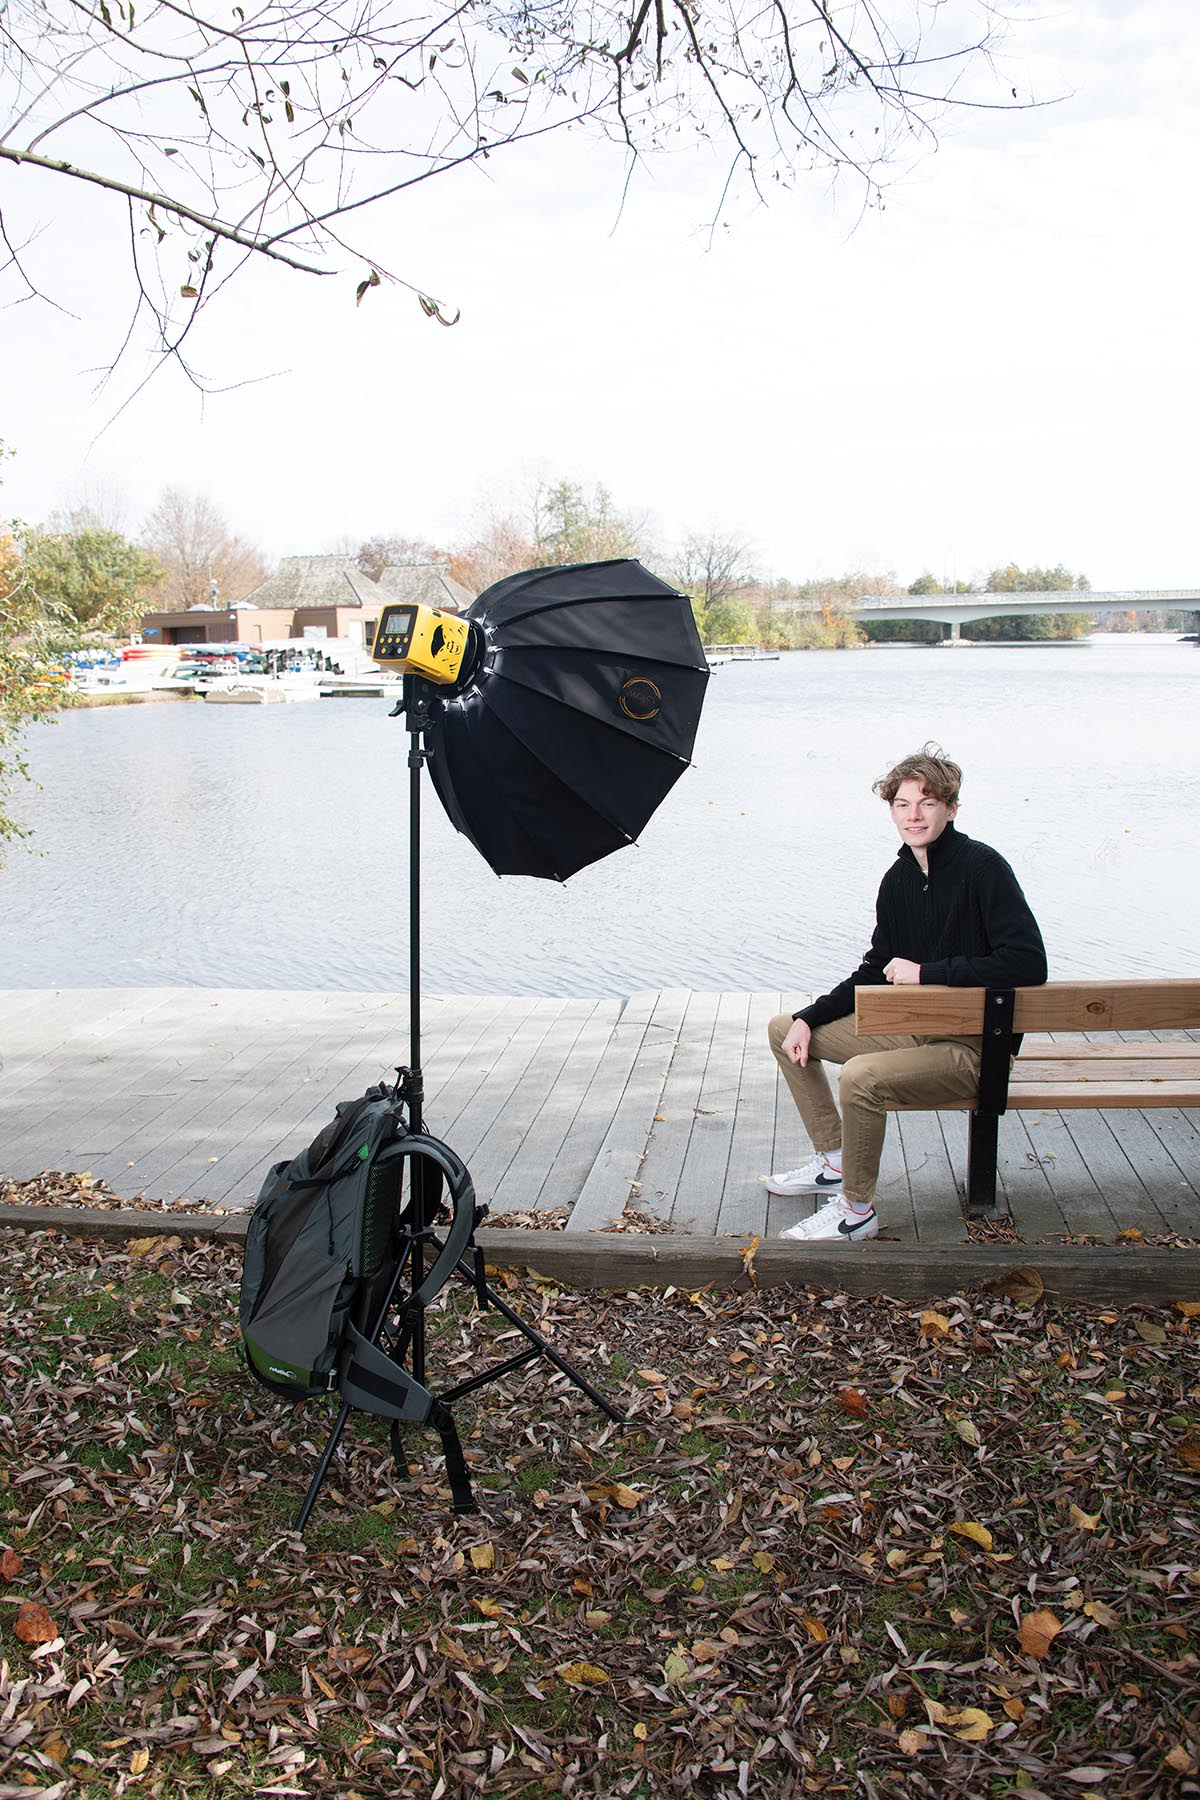
The ExpoDisc can be used with off-camera flash, ambient light, and LED light. Stand at the subject’s location and take a reference exposure with the lens and ExpoDisc pointed at the main light falling on your subject. If you’re not working with ambient light, fire your strobe for this exposure. Ideally you will put the camera in the same light that will be falling on the subject, from the same vantage point as the subject, aiming at the position you’ll be photographing from. This accounts for reflected light from walls or grass that may impact the color balance.
Practically speaking, this might not work for a fast-paced wedding or event. I can see improvisation being necessary unless you were to create reference images before or after key moments for use either during the event or in post-production. Note that if you plan to bounce flash off a wall or ceiling, you’ll need to create a reference image aimed at the bounce surface.
You can also use the ExpoDisc in conjunction with aperture priority mode to set your camera’s exposure. The ExpoDisc v3 ships with instructions on how to accomplish all these things and includes literature reminding you there are demo videos on the company’s website. With the camera in manual mode and an ExpoDisc over the lens, stand where the subject will be and aim at the position from where you’ll be photographing. Then adjust the camera’s settings (aperture, shutter speed, ISO) so that the meter reading is 0. Capture your reference image and review it on the camera’s LCD to make sure the histogram spike is centered. If it is, you’re all set.
The ExpoDisc v3 covers a wide range of visible light, from 380nm to 700nm. It also covers some of the near infrared spectrum and can be used to set white balance for an IR camera. Each ExpoDisc is inspected, and the results from the calibration certification testing are included in the packaging. Most of us will just be glad to know it’s accurate and consistent.
The ExpoDisc’s ease of use depends on your workflow, the type of photography you do, and whether you photograph in raw or JPG. My current workflow uses raw images, off-camera strobes, and a calibration card that has both gray and a color chart. For my work the ExpoDisc would probably yield similar results, but I would also want to photograph the color chart separately in case I needed a reference image in post-production. Photographers working events or on location with mixed ambient light sources will find the ExpoDisc a great tool. But all this color calibrating is for naught if you’re not also calibrating the monitors you use in post-production. It’s important to take color management full circle if you want accurate color in your final product.
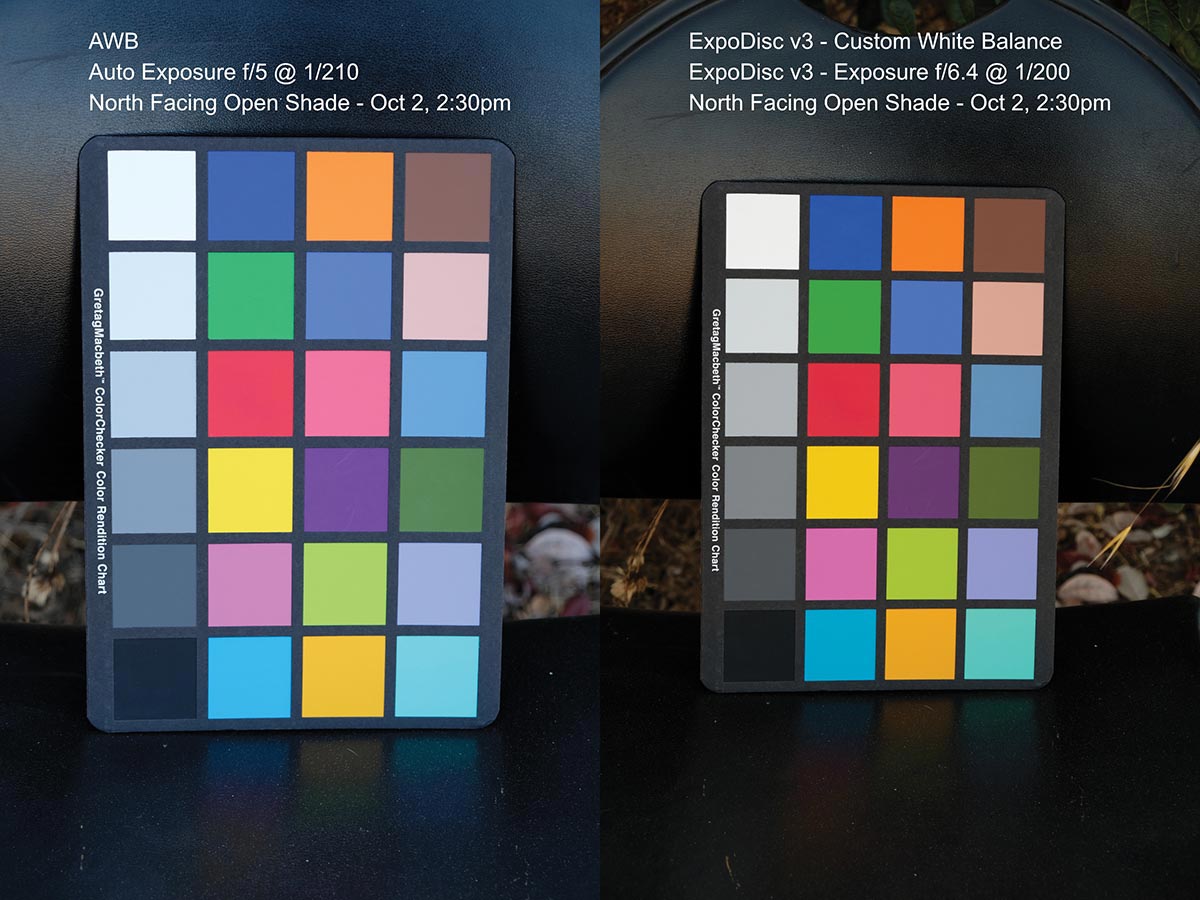
In this comparison of color charts in open shade with auto white balance (left) and a custom white balance (right), you can see the difference in the blue tint of the non-balanced card vs. the warmer, more accurate look of balanced card.
All in all, the ExpoDisc is a versatile tool that can be used indoors or out and in all sorts of lighting situations. Where it shines is venues with mixed light sources and in being able to capture correctly white balanced video. I can see the ExpoDisc being essential for an event or wedding photographer in particular. If you primarily shoot posed portraits with off-camera flash, the ExpoDisc may not significantly improve your workflow. But if you regularly deal with ambient light, it could save a lot of time. If you shoot video, the ExpoDisc could be essential for capturing footage requiring less post-production work.
The ExpoDisc v3 retails for $49.95 and comes with a neck strap, storage pouch, and adapter ring (77mm or 82mm). Additional rings are available for purchase for $9.95. If your lens is a different size you’ll need to purchase a step-down ring from a local or online camera dealer.
Betsy Finn is a portrait artist in Dexter, Michigan.
Tags: lighting
