You are probably familiar with the term “lighting pattern,” especially if you’ve taken the test to become a certified professional photographer. (For the record, I took it in January and passed.)
Lighting patterns describe how shadows fall on a subject. Not only is this something you need to know for the CPP test, but it’s fundamental knowledge we need when we’re choosing how to light our subjects. And if you’re a natural light photographer, don’t think for a second that this is some fancy stuff only flash people need to know.
Let’s explore nine different lighting patterns and how they can be used effectively. Imagine a clock with the camera positioned at 6, facing 12, and the subject standing right in the middle. The hours around the face will represent different positions for our light sources. The source could be a flash, the sun, reflected light—however the light is created. Knowing these lighting patterns gives you a repertoire of techniques to choose from. Employ them thoughtfully, with consideration for the unique characteristics of your subject, the desired mood, and the overall creative vision for your project. One more thing to consider is that these names relate to the relationship between the subject and the light, and it generally doesn’t matter where you stand to take the photos, so long as the lights don’t move and the subject’s head is still oriented toward 6 o’clock. In the end, what’s being described is where the shadows fall.
It’s essential to experiment, trust your instincts, and let your creativity guide you. You’ll develop your own style as you adapt these techniques to suit your vision and the needs of each project. The secret lies not in the names we give to these lighting patterns but in the creative journey we take as we learn lighting and get to know ourselves as creatives.

Split lighting
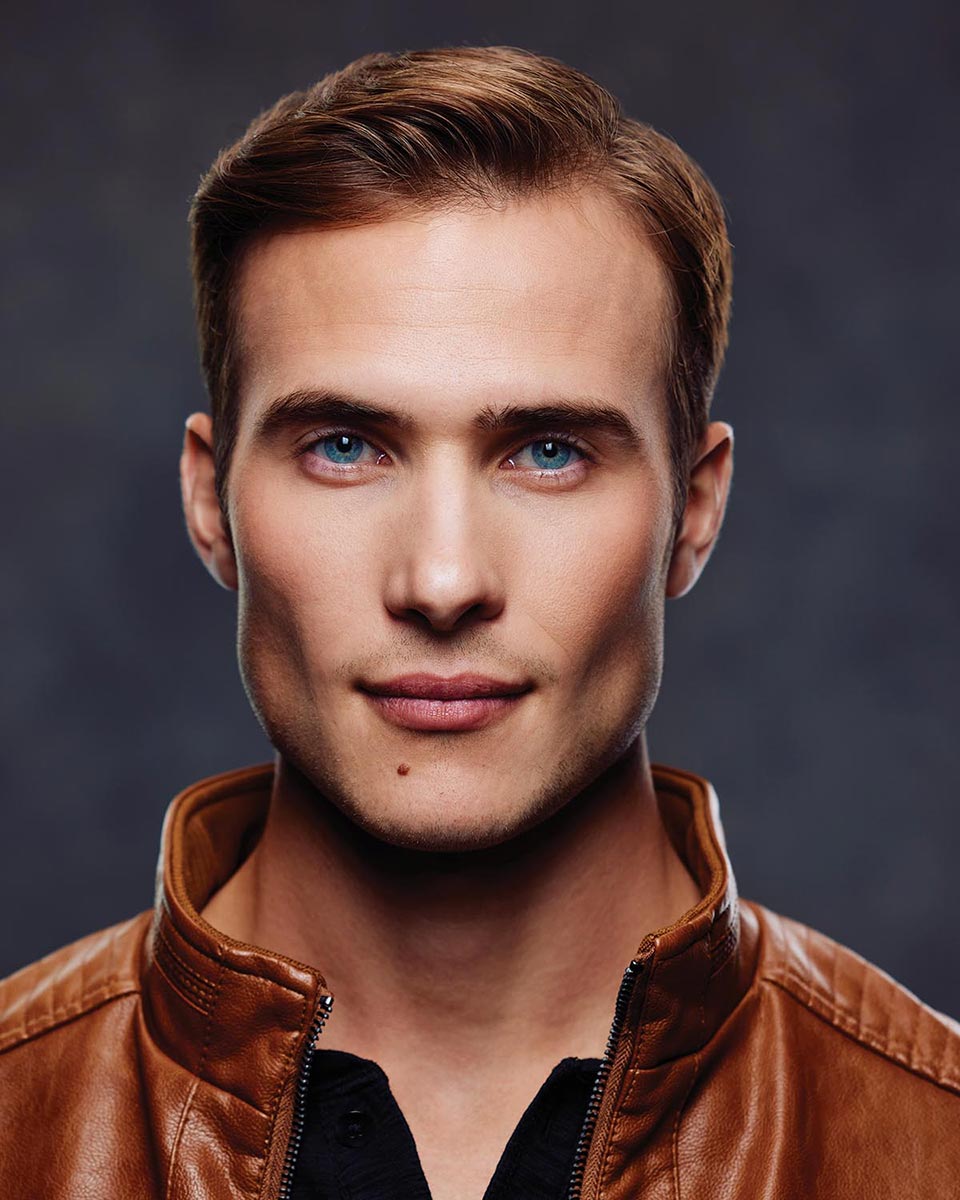
1. SPLIT LIGHTING: Split lighting is produced by setting a single light at either 9 or 3 o’clock, resulting in one side of the subject’s head being illuminated. While this technique can create interesting contrast, it may not always be the most flattering choice. In fact, I find it to be less than ideal. To showcase my reservations about it, I had to delve deep into my archive to find an example. Surprisingly, the first image I came upon happened to be a test frame.
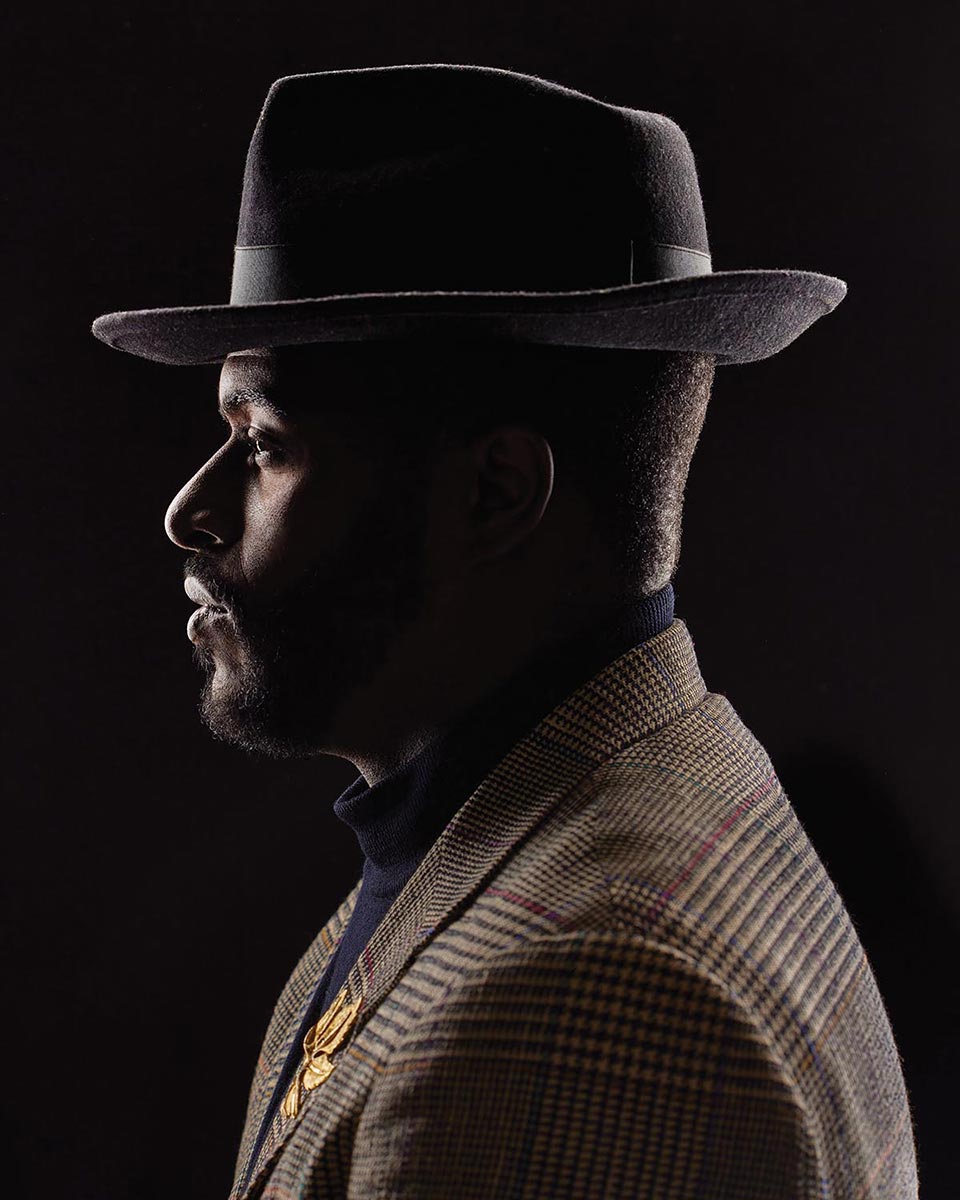
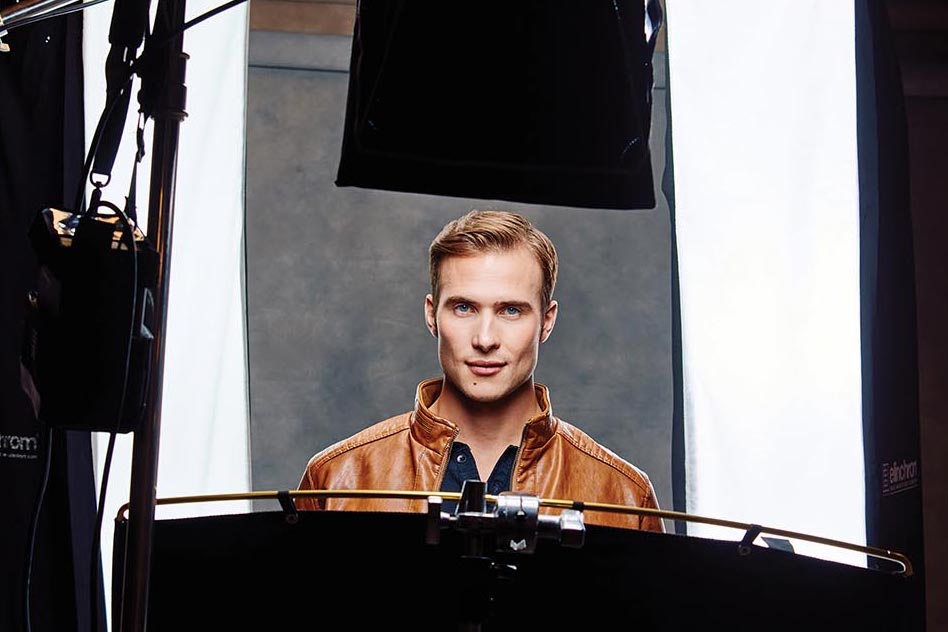
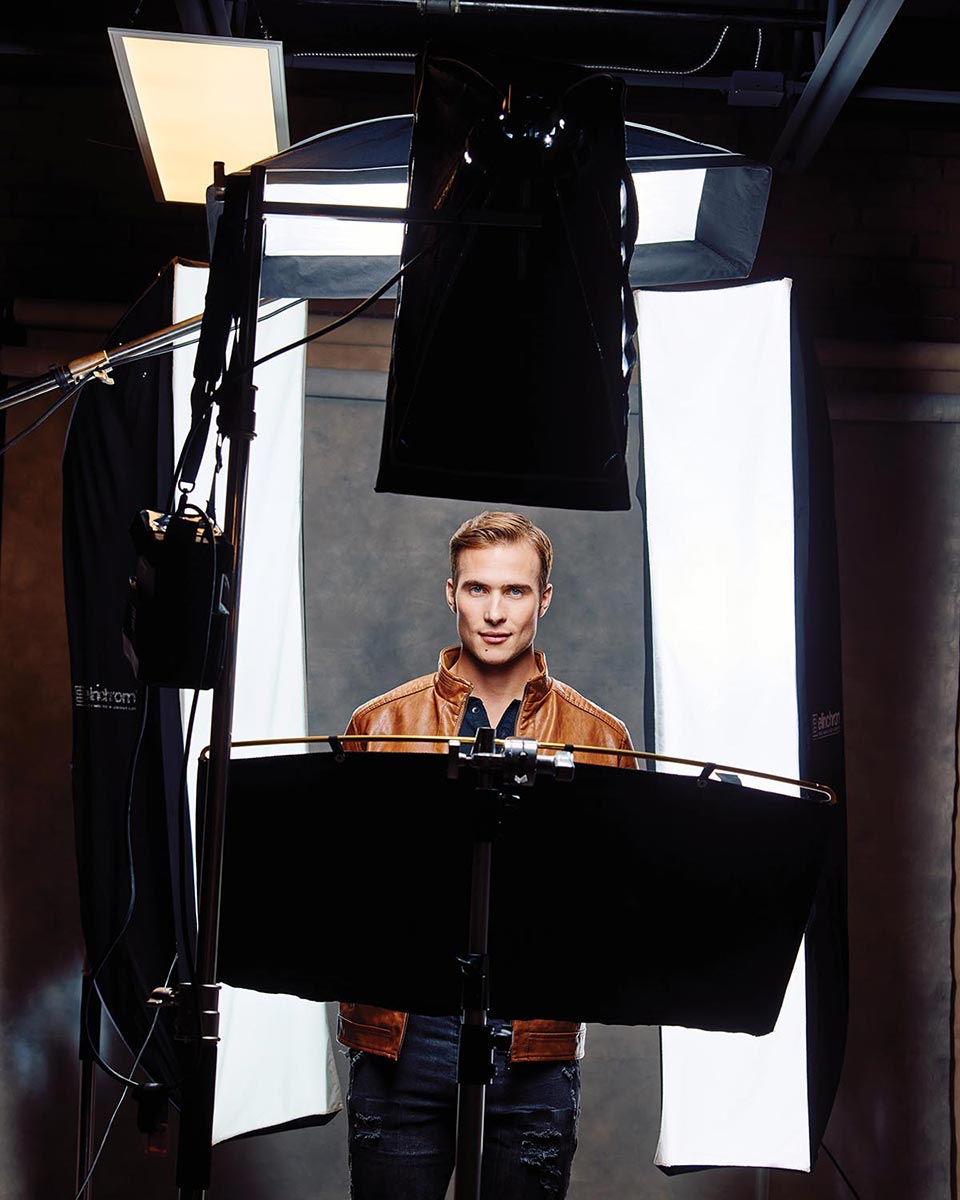
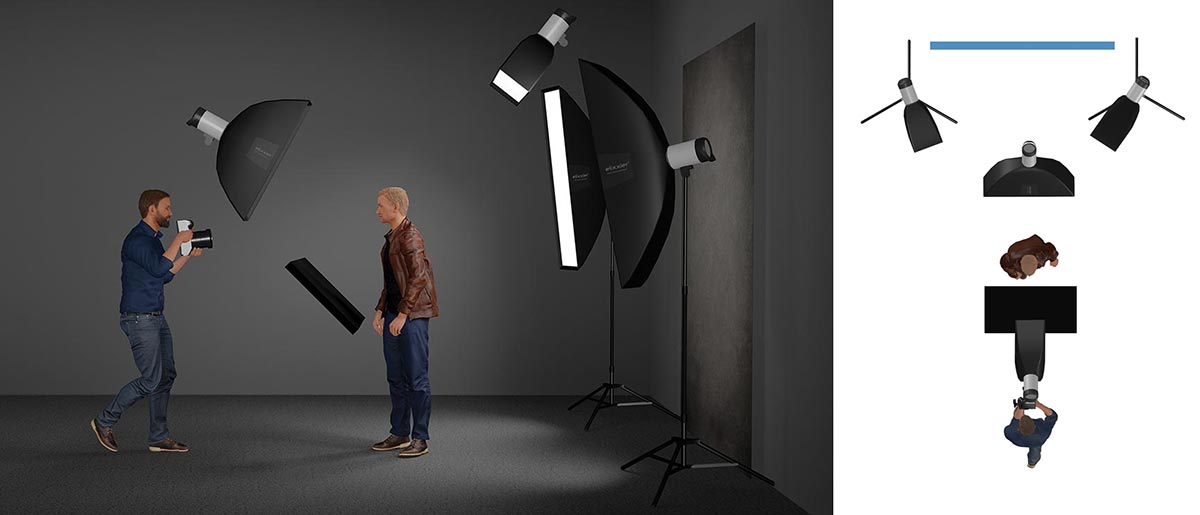
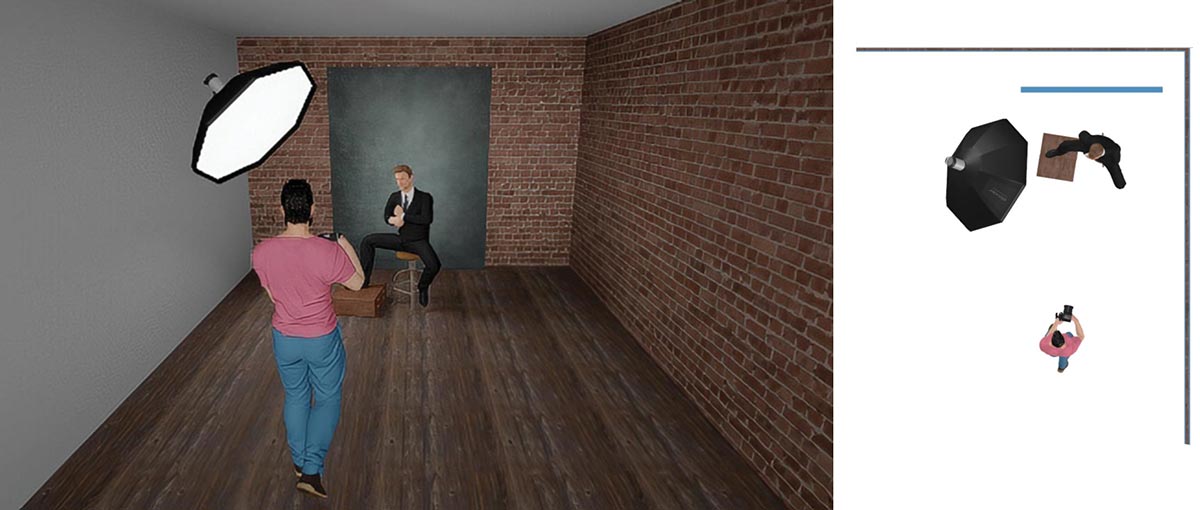
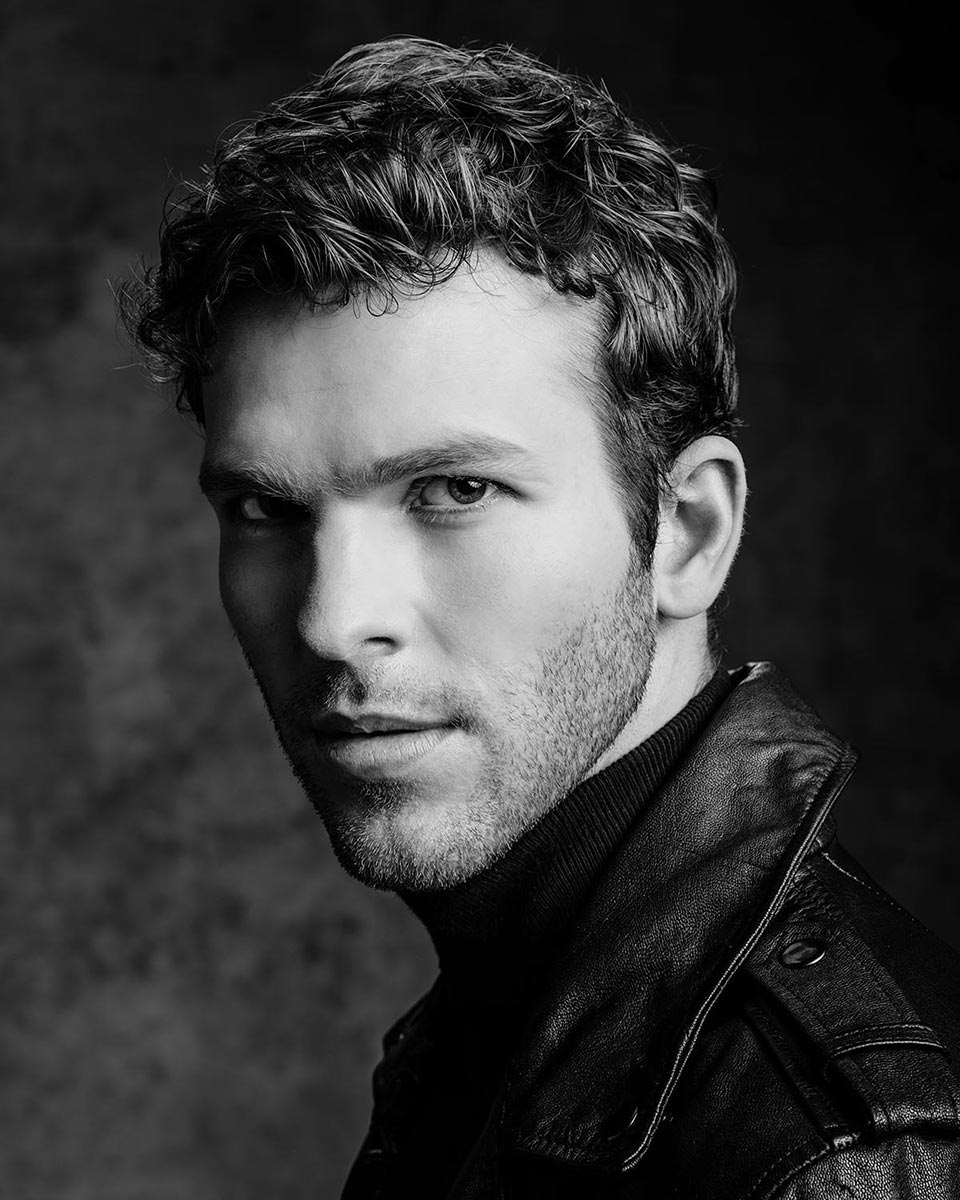
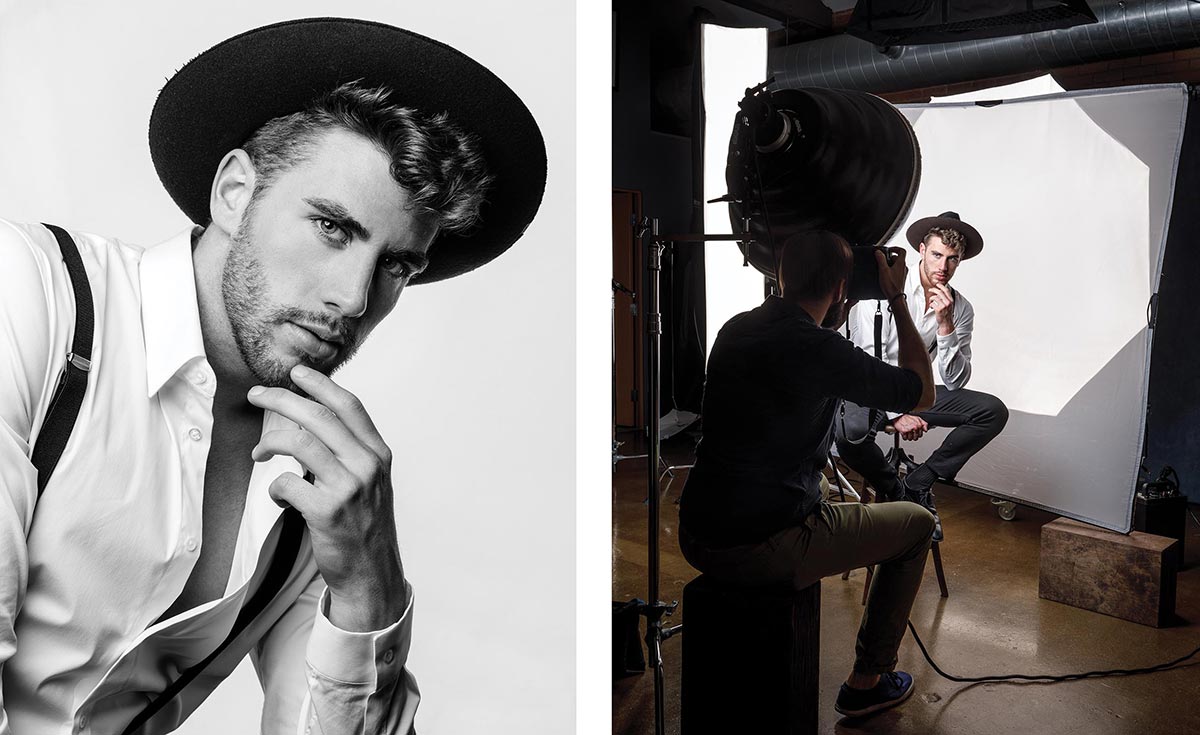
Backlight or rim lighting
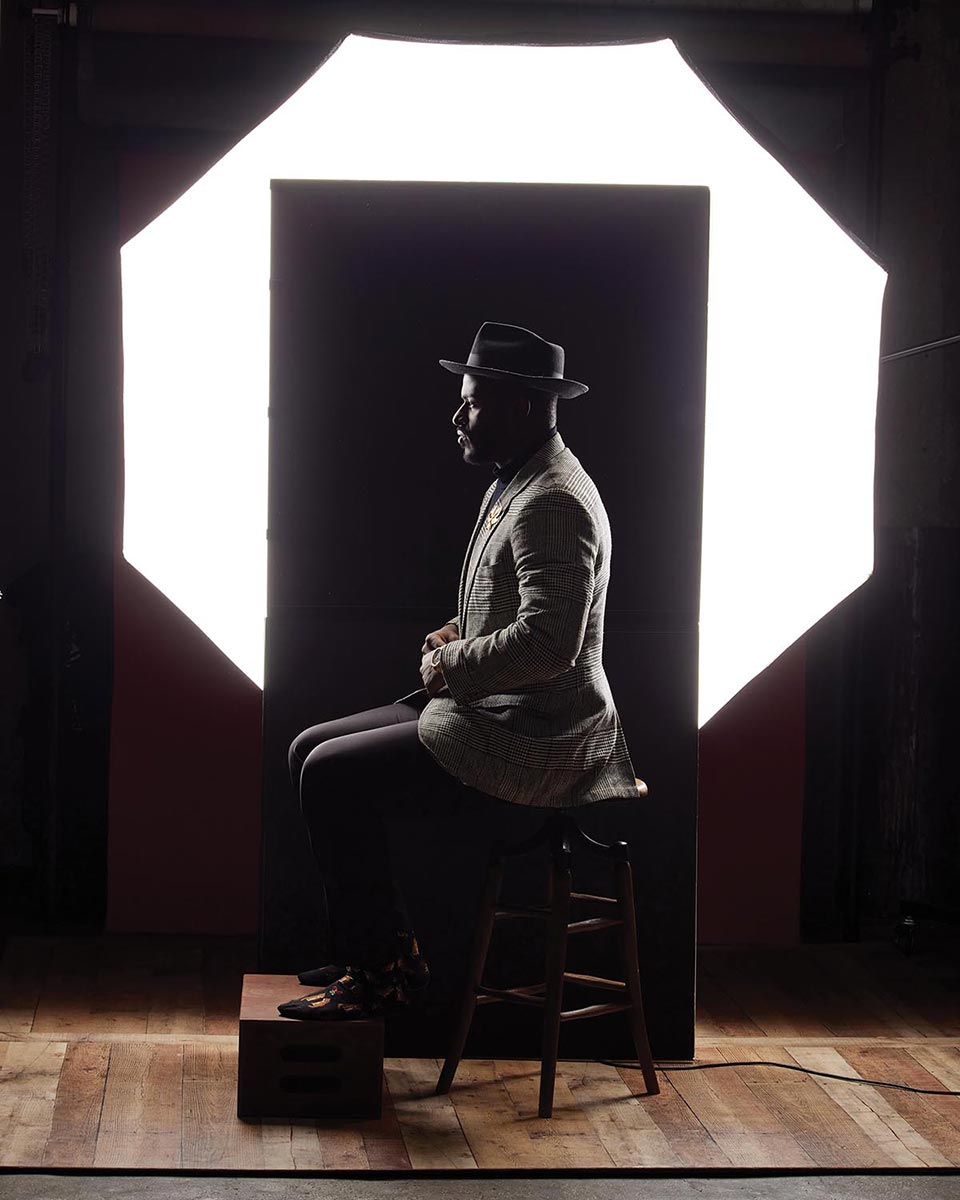
2. BACKLIGHT OR RIM LIGHTING: When the light is behind a subject at 12 o’clock, it can result in beautiful rim lighting. I love to pose subjects in profile with a black foam board between them and a large octabox. If the light source is a lot larger than the card, you’ll probably get a catch light—a reflection of the light in their eyes. But if you don’t, there’s a little trick you can use. Have the subject stand in profile facing your left, then have them turn their head slightly toward the light. If you shift to your left, you can probably capture a perfect silhouette with light on their eyelids. Conversely, you can have them face right and turn slightly left as you wiggle over to your right.
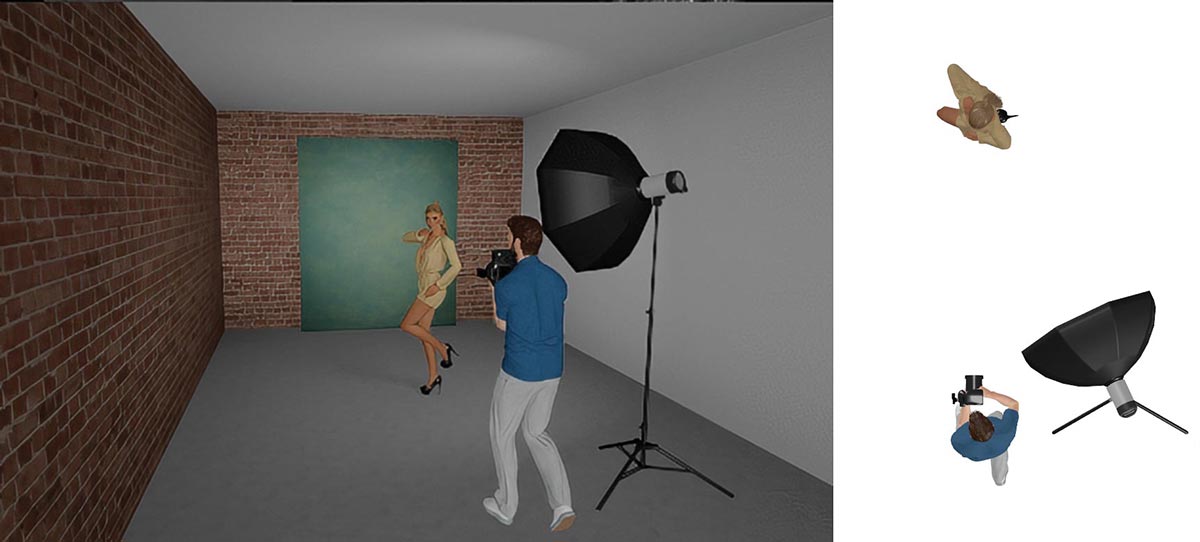
Butterfly lighting
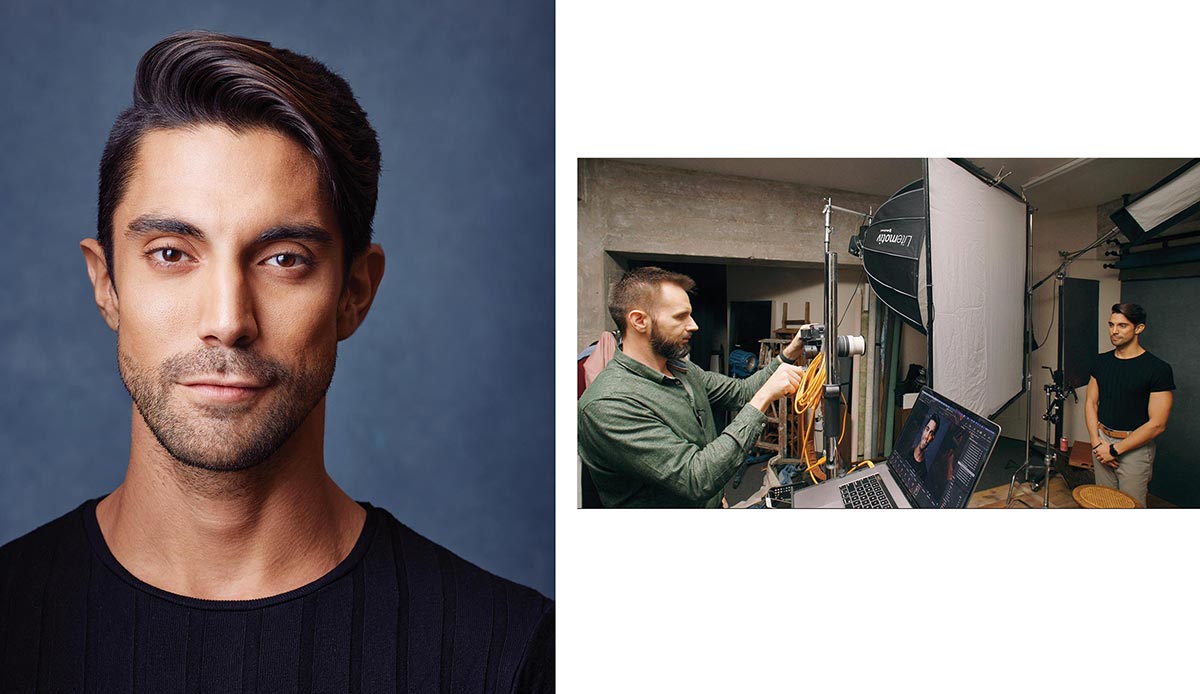
3. BUTTERFLY LIGHTING: Place a light source slightly above and in front of your subject at 6 o’clock to produce butterfly lighting. The resulting shadow under their nose and nostrils is supposed to resemble a butterfly, but let’s be real, not everyone sees it. If you place the light too high, you can end up with dark shadows covering their eyes or no catch lights. If this happens, turn on the modeling light and lower the light source until you see a reflection in their pupils.
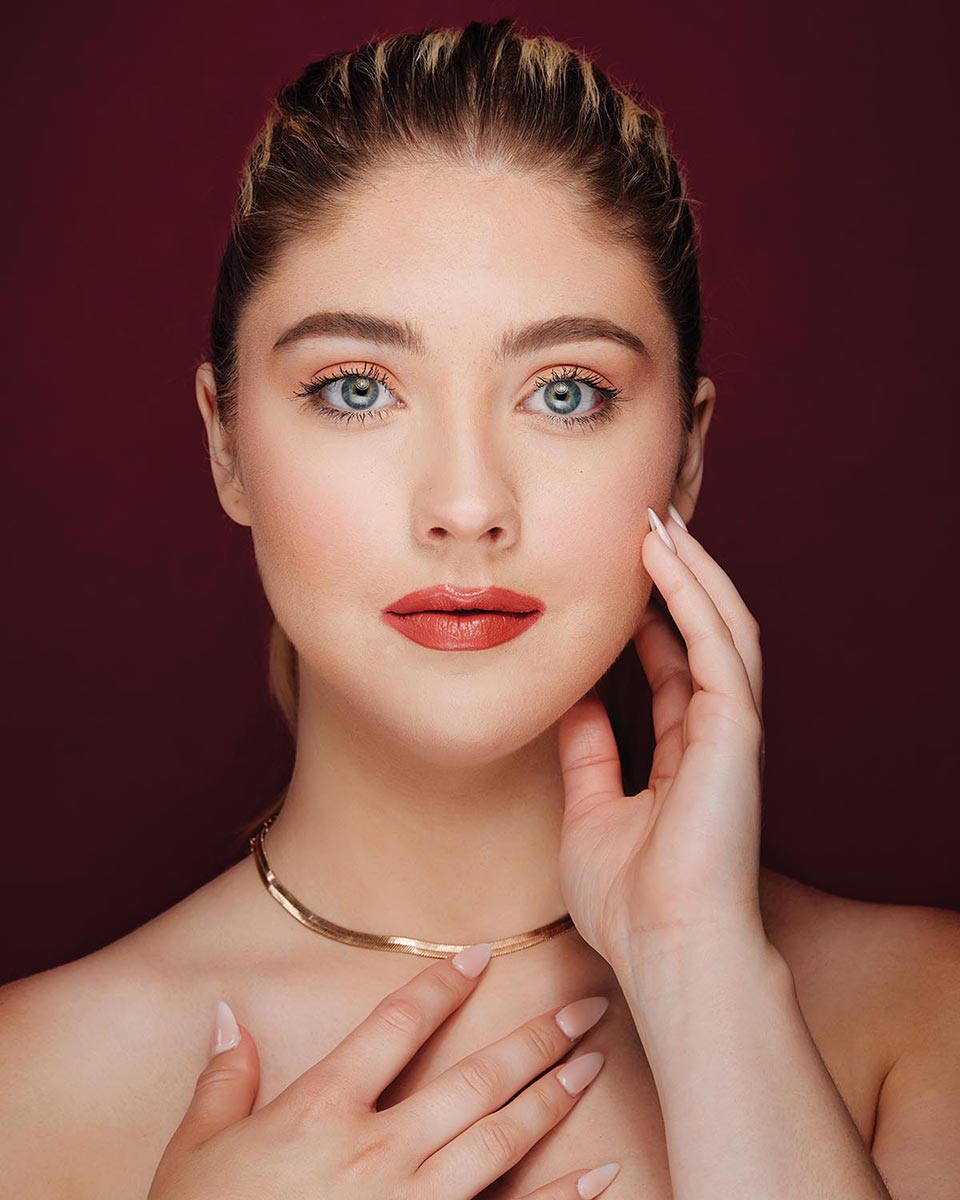
Clamshell lighting
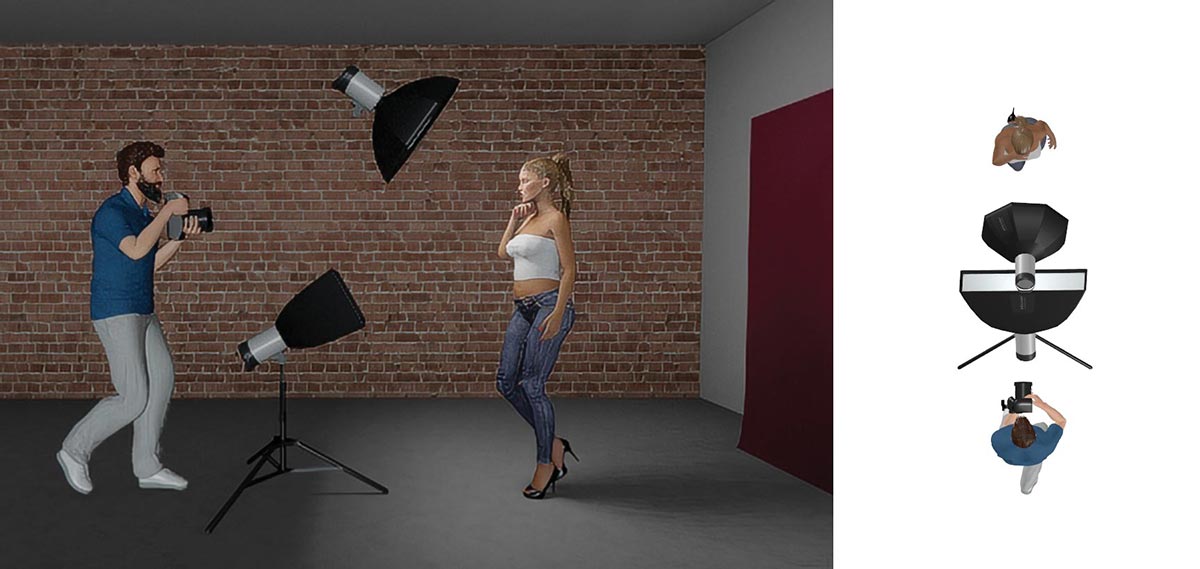
4. CLAMSHELL LIGHTING: Combine butterfly lighting with a reflector or light underneath for fill and you get clamshell lighting. From a side view, it resembles the shape of an open clamshell. This technique creates flattering light for a lot of subjects because the fill source softens wrinkles.
Loop lighting
5. LOOP LIGHTING: Position the main light just above eye level at approximately 5 or 7 o’clock to get loop lighting. This creates subtle shadows on one side of the subject’s nose and is generally pleasing for most people. If their nose bends to one side, putting the light on the side that their nose bends toward will typically make their nose appear straighter.
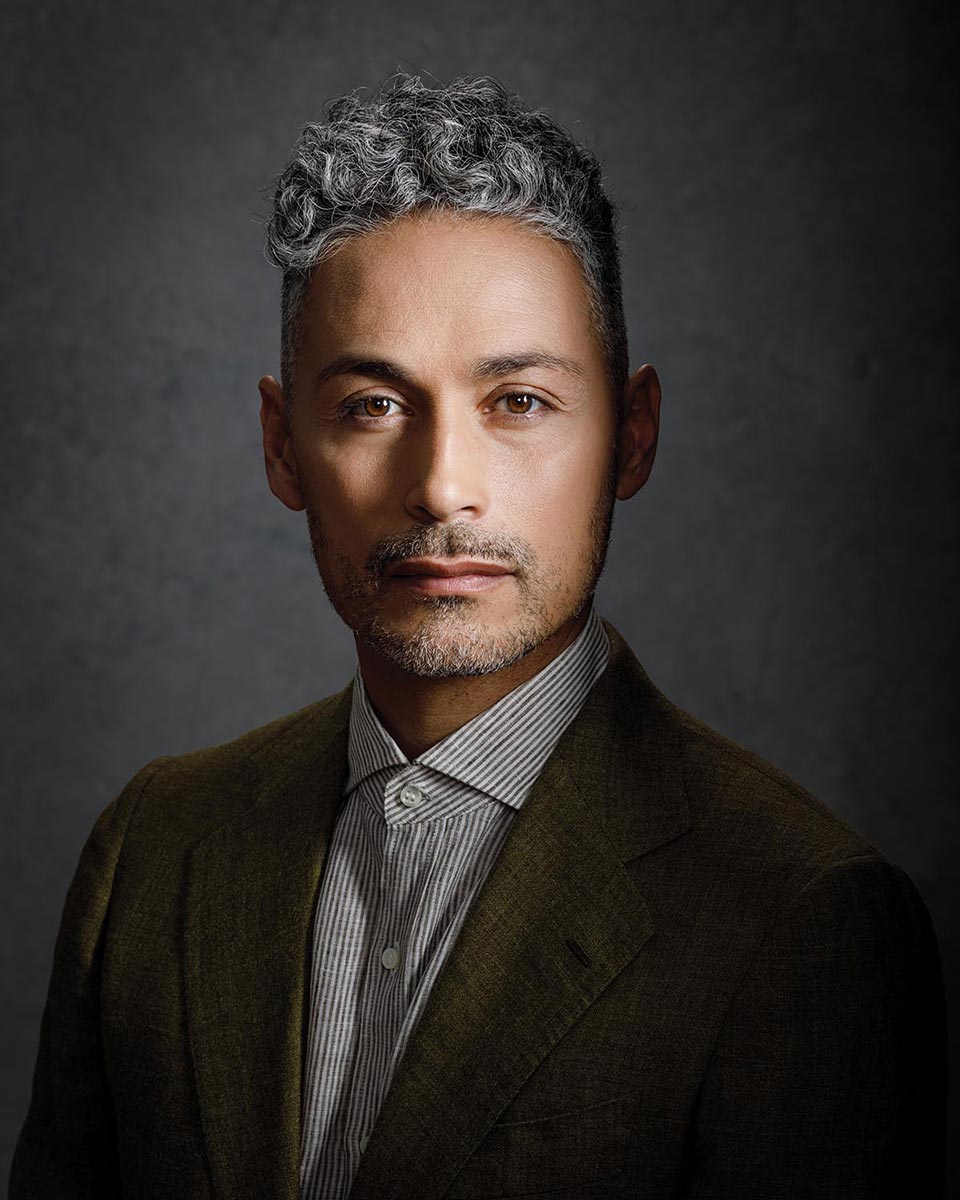
Rembrandt lighting
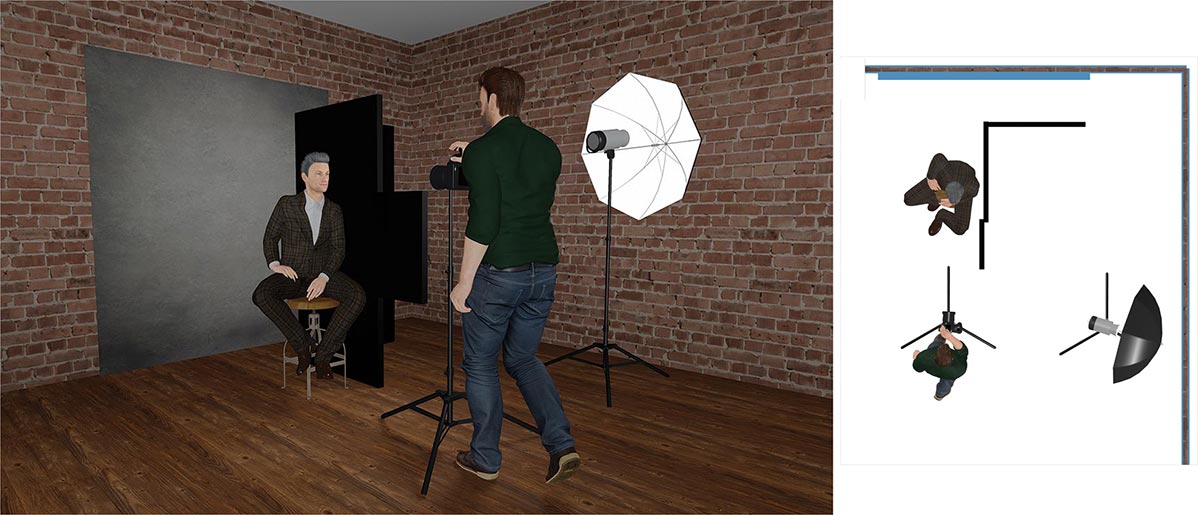
6. REMBRANDT LIGHTING: Named for the Dutch painter Rembrandt Harmenszoon van Rijn, Rembrandt lighting is achieved by placing the light close to 4 or 8 o’clock. The light source should be far enough to allow the shadow from the subject’s nose to extend toward the shadow from their cheekbone. This technique also results in an upside-down triangular light patch under the eye opposite the main light. While not suitable for all faces, Rembrandt lighting offers a captivating and artistic look that I love, and I use it frequently.
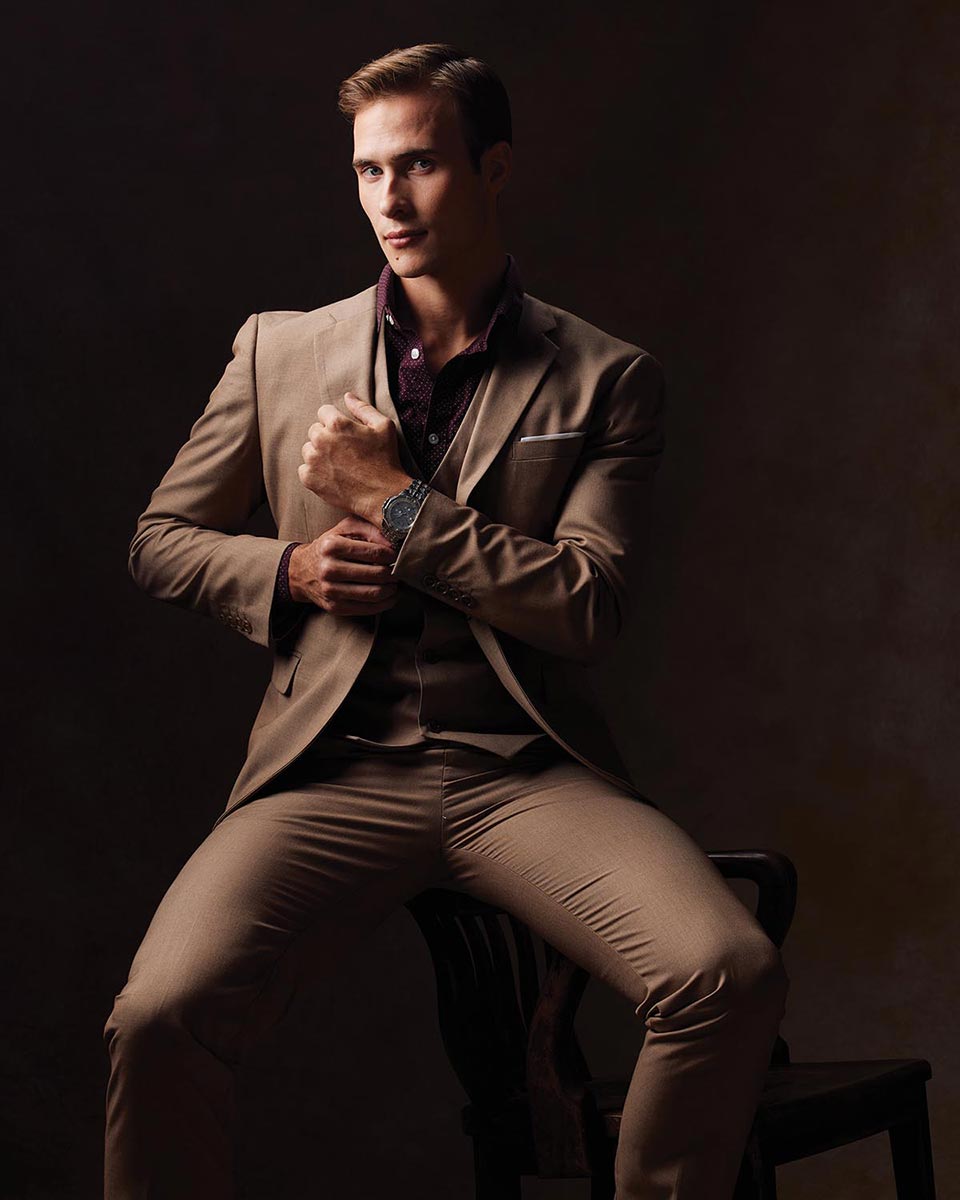
Short lighting
7. SHORT LIGHTING: Short lighting results by positioning the light source similarly to Rembrandt lighting and turning the subject toward the light. This technique can have a slimming effect on the subject because most of the face will be in shadow.
Broad lighting
Broad lighting
8. BROAD LIGHTING: Broad lighting is similar to short lighting, but the subject is slightly turned away from the light source. In this position, both eyes should receive light, and the face will likely appear broader by virtue of the fact that more of it will be illuminated.
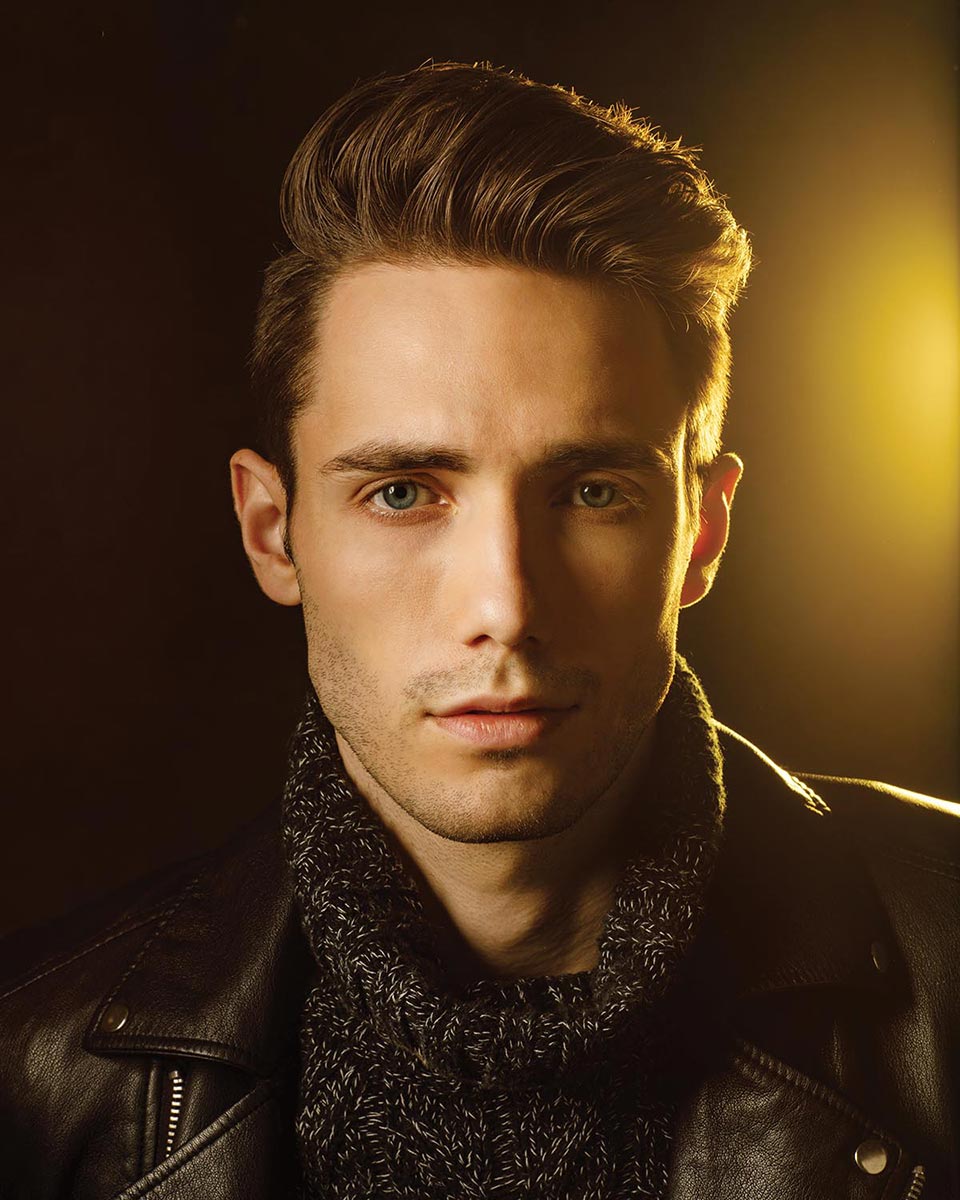
Cross lighting
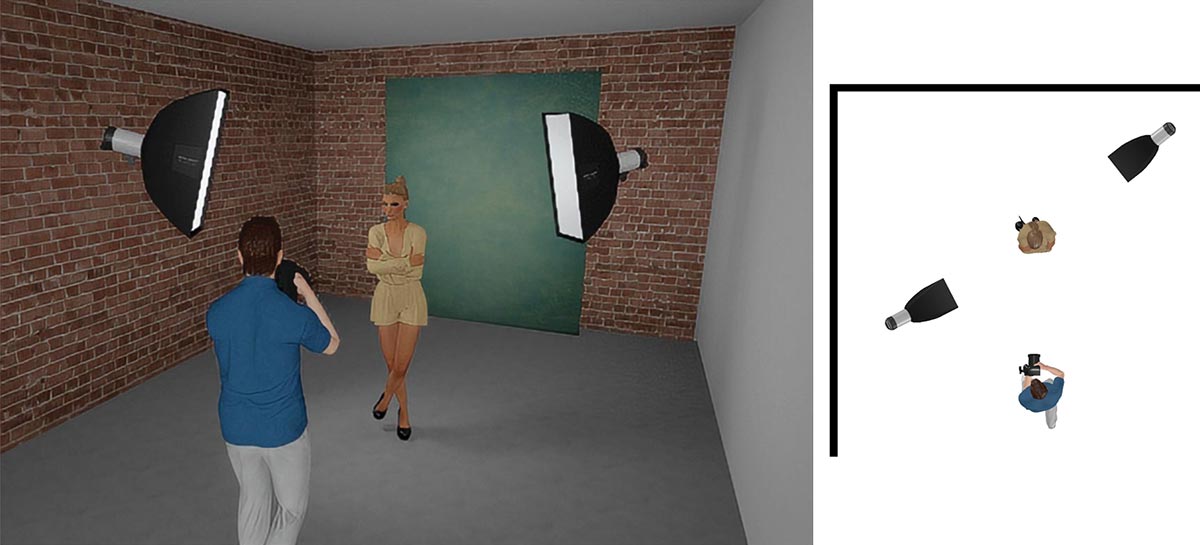
9. CROSS LIGHTING: To achieve cross lighting, place the main light source at 7 to 8 o’clock and an edge light at 1 to 2 o’clock. This creates a dramatic image with a three-dimensional look.
John Gress is a commercial photographer in Chicago and teaches lighting workshops across the country and on YouTube.