Sponsored Content
5 Ways to Turbocharge Your Image-Management Workflow (Using Cutting-Edge AI!)
• May 2024 Issue

If you're anything like me, you love taking photos. But you also know the unpleasant truth:
Organizing and searching through those photos; keeping your photo library carefully categorized and keyworded so you can find the images you want, when you want them…
It's a tedious, inefficient, and insanely time-consuming process.
Five years ago, you would have been stuck. You'd have spent hundreds of hours managing your image files - hours that would've been much better spent behind the lens, doing what you love.
But now, thanks to the power of cutting-edge AI technology, there’s another, better way: software that’ll streamline your existing photo management workflow and make it faster, easier, and so much more efficient.
Below, I share the best image-organization software on the market today: the Excire product lineup. And I’m also going to share five ways that Excire’s cutting-edge tools (prompt-search, auto-keywording, people search, and more) will save you so much time culling, searching, and categorizing photos.
Ready to get your image catalog under control? Let’s dive right in!
What Is Excire Image-Management Software?
Developed by a small but mighty German company, Excire has been sending shockwaves throughout the photography industry thanks to its cutting-edge AI tools and intuitive interface.
At its core, Excire software harnesses the power of AI to:
- Efficiently clean up and organize your catalog of thousands (or even millions!) of images
- Search through your existing image catalog so you can find literally any photo in a few seconds. (Of course, the image needs to already exist in your catalog for Excire to retrieve it; you can’t find what you don’t have!)
- Help you cull photos quickly and effectively
Excire makes it simple to turn a messy set of photos into a well-ordered, accessible image library. And the tools are always at your fingertips, so even as you add new files to your catalog or need to find new images, Excire can help.
You’re probably wondering:
Will Excire’s software work with my current post-processing workflow? What about Lightroom, Photoshop, or Luminar - do I have to give up all those editing programs to use Excire’s AI tech?
Fortunately, the answer is no. Excire is not designed to replace your existing editing workflow; rather, it’s meant to supplement and improve it.
You see, you can use Excire in two different ways:
- As a standalone program, called Excire Foto 2024. EF 2024 is designed to work alongside image editing software such as Lightroom, Luminar, Photoshop, Capture One, and Affinity Photo; that way, you can manage your images with Excire’s amazing tools, and you can process your photos using your favorite editor.
- As a Lightroom plugin, called Excire Search 2024. Excire Search integrates seamlessly with Lightroom Classic, so you can use all of Excire’s most powerful features inside the existing Lightroom interface.
If you’re not heavily invested in Lightroom Classic, I’d recommend grabbing Excire Foto 2024 (the standalone software). The interface is intuitive, and using Excire’s various tools is unbelievably easy, even for a complete beginner.
If you're a dedicated Lightroom user, the Excire Search plugin is the better route. Like I said, the integration is seamless, and adding Excire’s AI to Lightroom’s existing image-management features is an absolute game-changer.
Anyway, now that you’re familiar with the basics, I’ll walk you through five specific ways you can use Excire to level up your workflow.
(Note: The examples in this article reference Excire’s standalone program, Excire Foto 2024; however, all the same functions are available in Lightroom using Excire Search 2024!)
1. Find Specific Photos Buried in Your Catalog With the Find By Text Prompt Tool
The Find by text prompt feature is new in Excire Foto 2024, and it is insanely effective. When I need to find an image in my library, it’s the first place I go, and most of the time, it’s all I need - it really is that impressive.
Here’s how you can use it to find your own photos:
First, select the Find by text prompt tool in the upper right-hand corner:

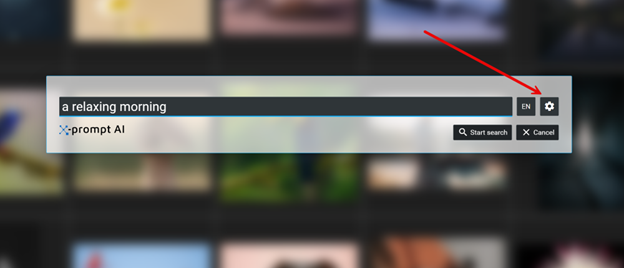
Type a description of your desired image into the search field (such as “child laughing on the beach” or “waterfall at sunset” or even “a relaxing morning”), and hit Start search:
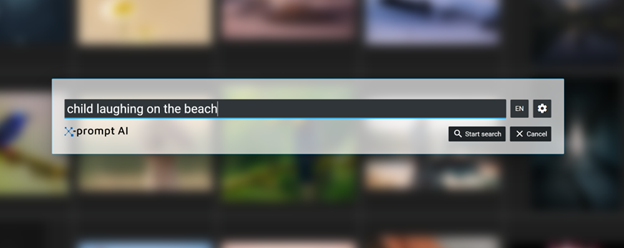
After around a millisecond of waiting (seriously), Excire Foto 2024 will immediately return the image you’re looking for.
And if you’re not getting the results you want, you can always tweak the tool’s settings by pressing the Gear icon and adjusting the options under the hood:
As I said, the prompt-search tool is often all that’s needed to find a missing photo, but it does have limitations; for instance, it can’t use facial recognition to identify people, and it can’t access keywords added to your photos. That’s where several of Excire’s other tools come in handy:
2. Find Photos of Specific People With Facial-Recognition Technology
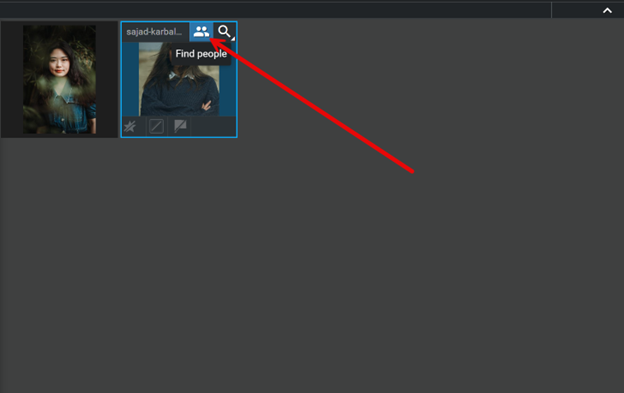
Say that you’re creating a photo album, and you want to view all the images you’ve ever captured of your daughter, Ellie. With Excire Foto 2024, this is not just possible, but easy.
Start by selecting an initial photo of Ellie. Then tap the Find people icon in the corner of the thumbnail:
The Find People dialog will appear; here, you simply need to make sure that Ellie’s face is surrounded by the green rectangle:
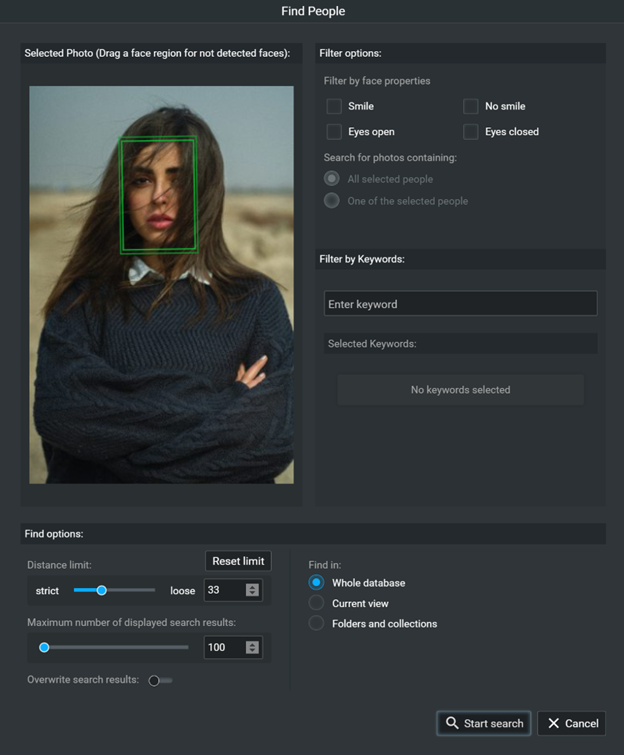
You can use the various filters and tools to adjust the output, but I’d recommend just starting with the default options, which are quite solid!
One exception: If you have a lot of photos of Ellie, and you wish to see all of them, go ahead and boost the Maximum number of displayed search results:
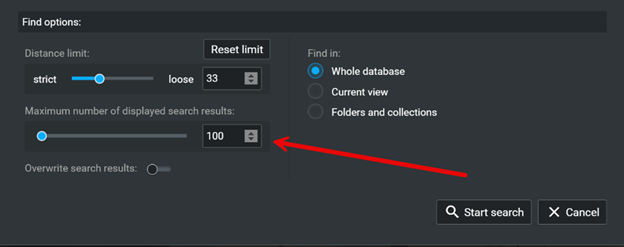
Then click Start search!
The program will use its cutting-edge facial-recognition tech to return a slew of images featuring Ellie, which you can then go through for your photo album!
Of course, this tool isn’t limited to family photo albums; you can also use it to quickly find all your images of a specific model, senior portrait subject, etc.
(And by the way: Excire also offers another photo-organization facial-recognition tool, called Find faces; instead of looking for specific people, it lets you search your catalog for people with different characteristics, such as age, gender, smiles, etc!)
3. Categorize Your Photos With X-tags AI
As you probably know, keywording is a great way to tag your images so they can be easily sorted into folders, found via keyword searches, etc.
However, manually reviewing each and every image while applying relevant keywords is a time-consuming task (one that most photographers - myself included! - struggle to stay on top of).
So here’s the deal:
To make life a lot easier for you, Excire’s AI technology automatically applies keywords when you first add your images to the program. You don’t have to do anything (except make sure that you toggle the Analyze photos option when you add your files).
Once the import-and-analyze process is done, you can click on any image - and you’ll see the keywords that Excire added along the right-hand side:
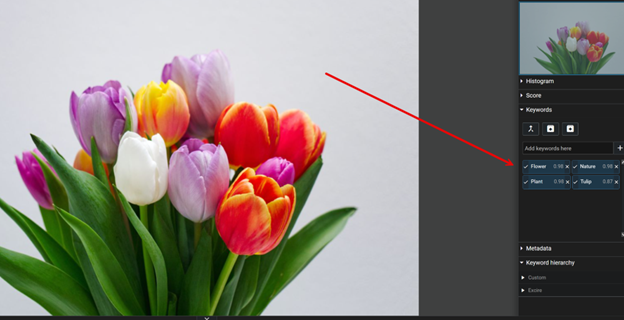
(And if Excire adds a keyword that doesn’t seem relevant or that you just don’t want, you always have the option to delete it.)
You can also add your own custom keywords; just type the relevant keyword in the Add keywords here field:
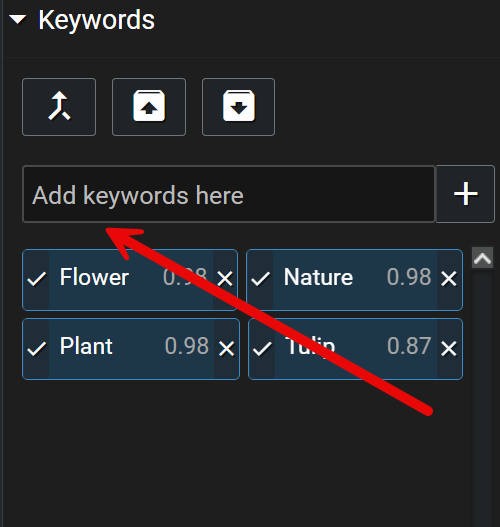
Then hit Enter.
Earlier in this article, I talked about the power of Excire’s prompt-search AI feature. It’s a great way to locate specific photos, and in many cases, it results in more precise results than a keyword search.
However, once Excire adds keywords to your photos - or you add keywords manually - you’ll sometimes encounter scenarios where you want to search for all the images tagged with a particular keyword or set of keywords. And that’s where Excire’s keyword search comes in handy.
Just choose the Find by keyword icon in the upper right-hand corner:
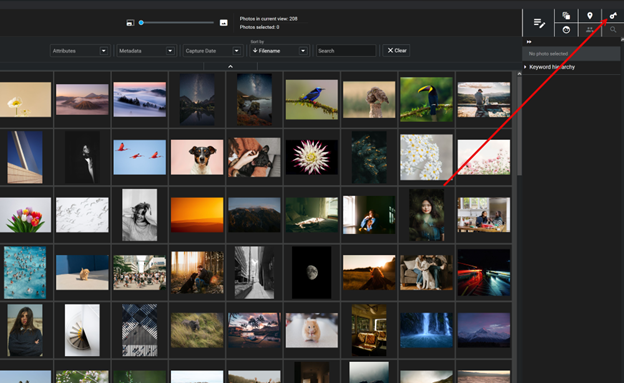
Select the tags you want to use in your search:
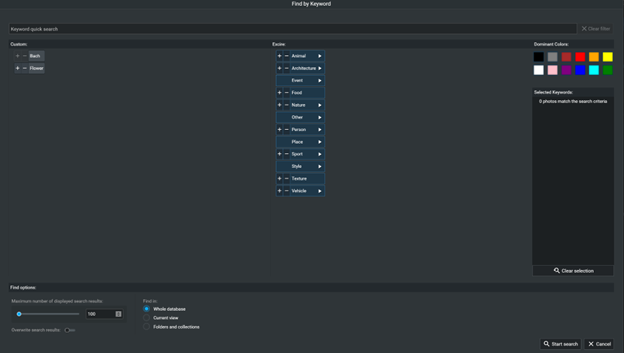
And then click Start search. Excire Foto will instantly return any images that contain the selected keywords!
That way, you can quickly retrieve sets of images without needing to search through your entire database!
(One more quick tip: If you’re struggling to locate a specific photo, you can always use the prompt-search and the keyword-search tool in combination to quickly find the missing image! First, you could narrow down the results to a small set of keywords; then you could use the prompt-search tool to pull a specific file from the remaining group of photos!)
4. Clean Up Unwanted Duplicates With the Find Duplicates Search
Duplicate photos - whether they’re various copies of the same file, stacked or HDR files of the same scene, or a series of near-identical images captured in a burst - can be such a pain to manage. They take up space, plus they make it more difficult to find the photos you want.
That’s where Excire Foto 2024’s Find duplicates tool can make such a difference.
The de-duplication feature uses powerful AI to identify all the duplicate or near-duplicate photos in a specified set of images, and then it serves them up so you can quickly flag your favorites and reject the rest.
Here’s how it works:
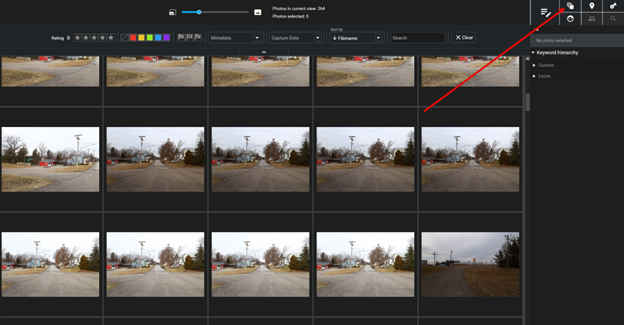
First, click on the Find duplicates tool:
Next, make sure the relevant set of images is selected. If you want to weed out all duplicate files from your entire photo library, selecting Whole database is a good idea; alternatively, if you only want to find duplicates from a set of photos you’ve just added to Excire, you can choose Folders and collections, then choose the relevant folders and/or Collections for searching.
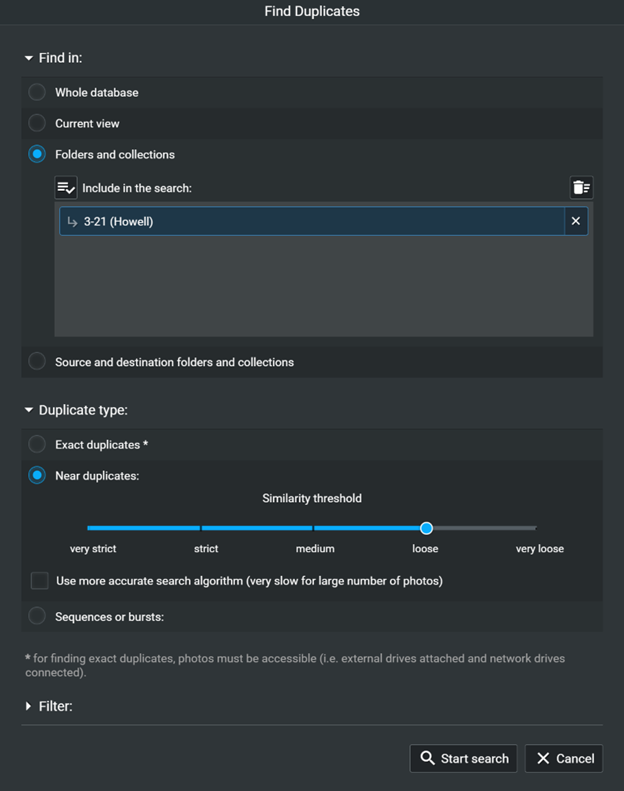
You’ll then need to select the duplicate type. You have three options, and each is useful in a different scenario:
- Exact duplicates is effective when you want to find images that are genuinely identical - identical content, identical resolution, identical file quality.
- Near duplicates is effective when you want to find images that are identical or almost identical in content but not necessarily in every technical way. (For instance, a large version and a small version of the same photo would be retrieved using the Near duplicates option, as would several focus-stacked images of the same scene.) Note that you can adjust the Similarity threshold in order to widen or narrow the algorithm’s net.
- Sequences or bursts is effective when you’ve captured lots of photos over a very short period of time, and you want to pick the best and remove the rest. Here, the images won’t necessarily be identical, but they will have been captured within a few seconds of one another. Note that you can adjust the maximum time span between photos in order to retrieve a stricter or looser result.
Once you’ve chosen a duplicate type, feel free to add filters in the Filter panel, then select Start search.
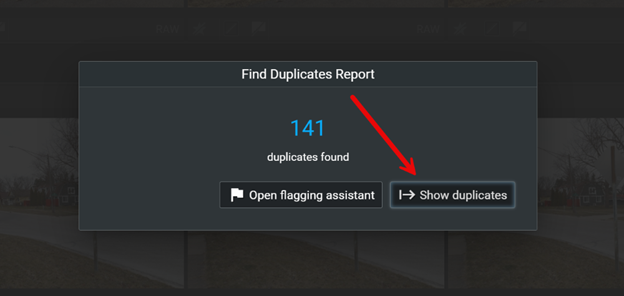
You’ll then see a report, which will list the number of duplicates. I generally recommend choosing Show duplicates:
And you’ll be presented with your images organized into sets of duplicates:
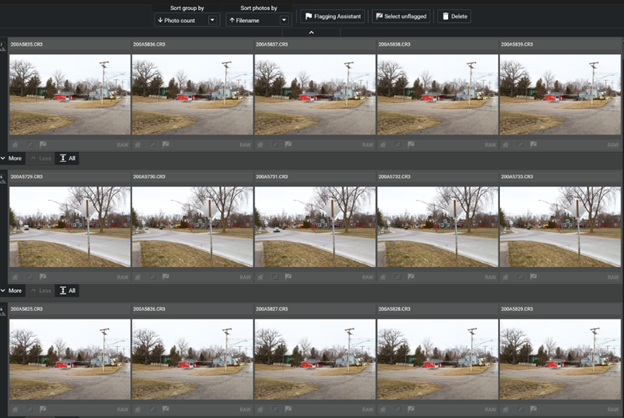
From there, you can go through each set and quickly Flag your favorite shot from each set (click on the image, then press P on your keyboard!), while leaving the rest untouched.
Then, if you want to clean up the remaining files, press Select unflagged and press X on your keyboard to apply the Reject label.
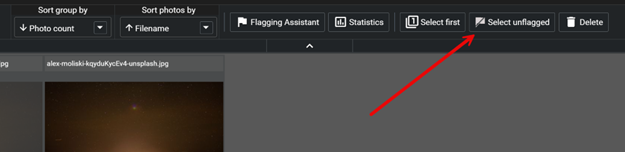
Finally, click the Delete button, then follow the instructions to either remove the rejected photos from Excire or your hard drive.
5. Sort your photos from best to worst with X-tetics AI
This is another new feature in Excire Foto 2024, and it’s mindblowing.
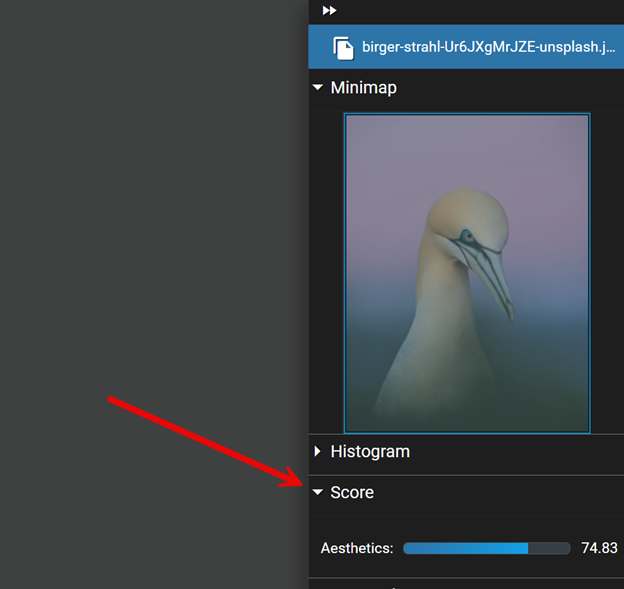
You see, Excire’s X-tetics AI software, trained on hundreds of thousands of photos and input from top-tier photographers, provides an Aesthetics Score to help you select your top shots for sharing on social media and with clients.
(Just make sure that you toggle the Analyze photos option when you add new files to the program.)
The higher the score, the more impressive the image (in the eyes of the AI, that is!). If you’re going through a set of photos and you’re struggling to decide whether a particular shot is actually good, you can always check the Aesthetic Score, which will appear on the right-hand side:
More importantly, you can sort Collections, Folders, and even your entire catalog by the Aesthetic Score if you choose Sort by: Aesthetics in the main menu.
So after you’ve completed a photoshoot, instead of spending hours trying to figure out which images to add to your portfolio or deliver to clients, you can use the Sort by: Aesthetics option to instantly identify your best shots.
From there, you can choose to go through your highest-scoring photos, or you can just follow the software’s recommendation and move forward with the top-ranked files!
Organize Your Photo Catalog With Excire!
Managing your photos used to be tedious and time-consuming. But with Excire, it’s rapid, it's simple, and it's even (dare I say it?) fun.
You can get so much done in so little time, and since Excire’s AI-powered tools are so intuitive, it’s ultra-easy to get started. Plus, Excire isn’t a one-trick pony; it packs lots of different features to help you find and organize images (including more tools that I didn’t discuss, such as a GPS search and a similarity search). Basically, Excire is like a toolbox for managing your images - and for the most precise results, you can work with multiple tools in combination!
To learn more about Excire’s cutting-edge software, head over to the company website. Excire currently offers 14-day free trials for both Excire Foto 2024 and Excire Search 2024, so I encourage you to download the software and see what you think!
But be advised:
Once you start using it, you may never want to stop!