From my years of documentary and travel photography, I’ve found that three elements are key to successful flash photography in the field: proper balance with ambient light, proper color balance, and position of the artificial light source.
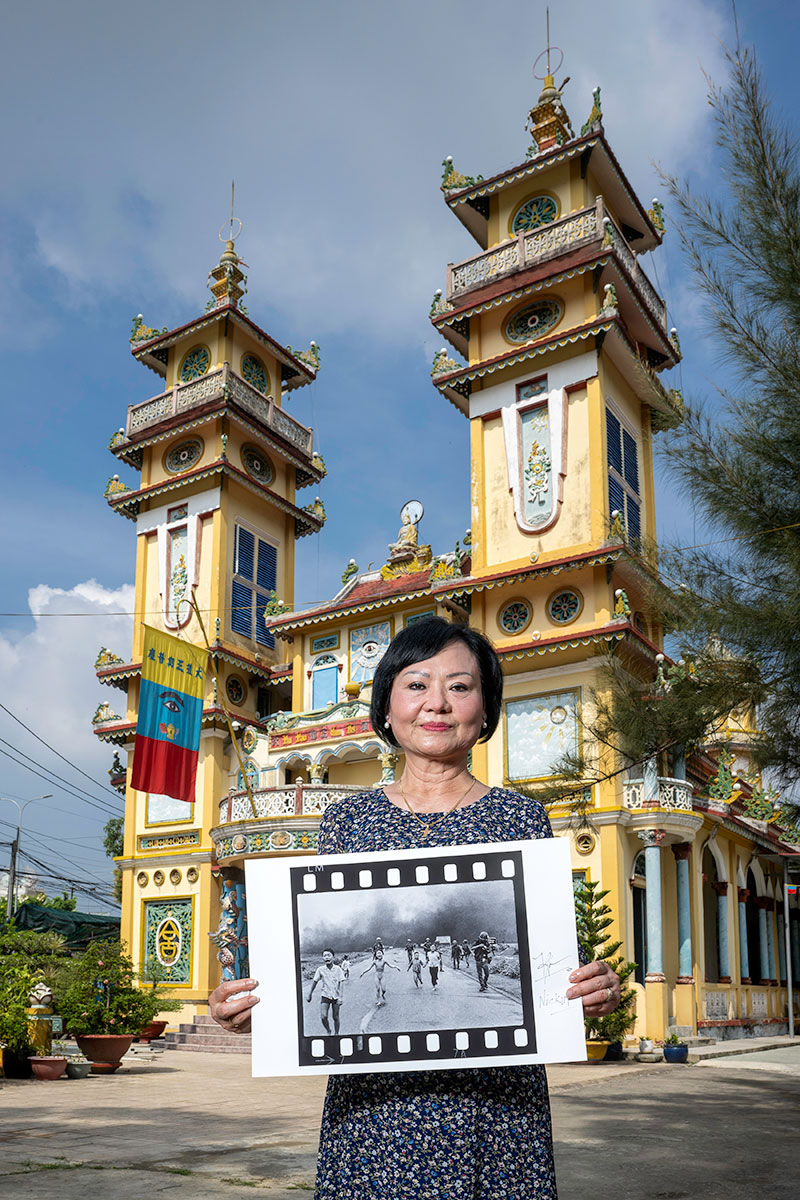
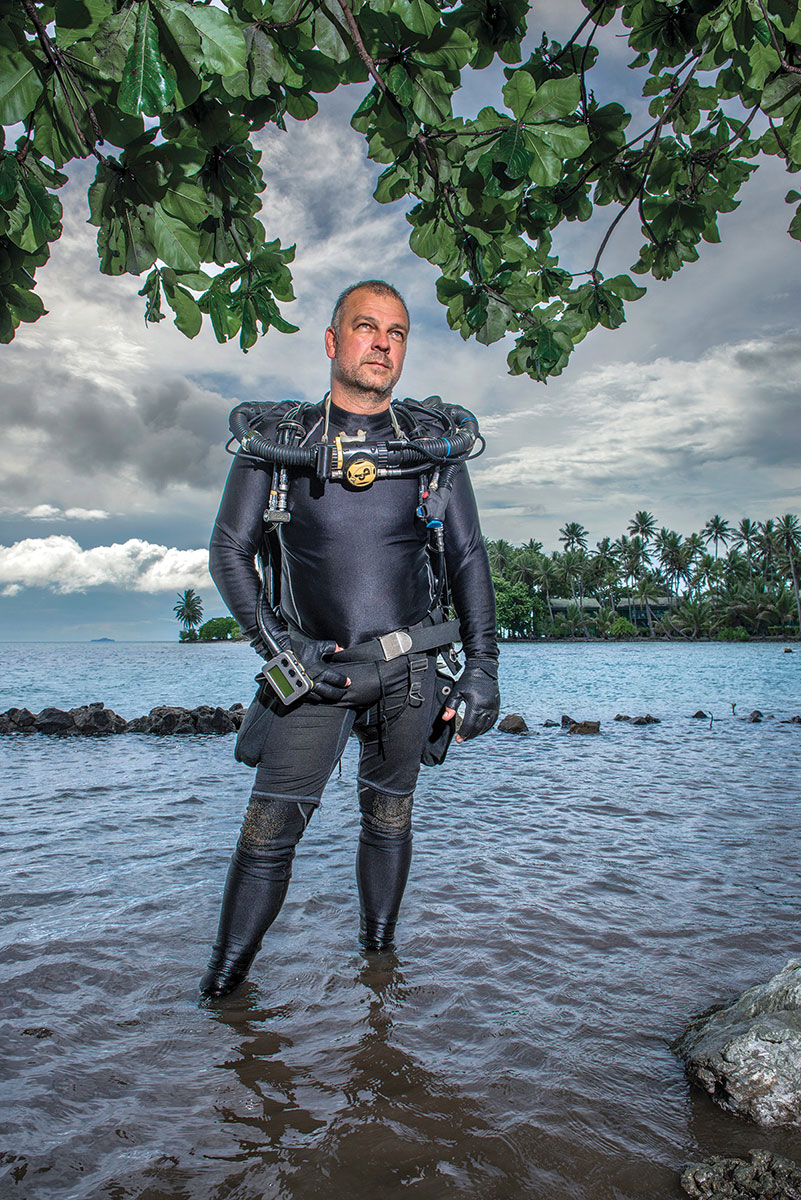
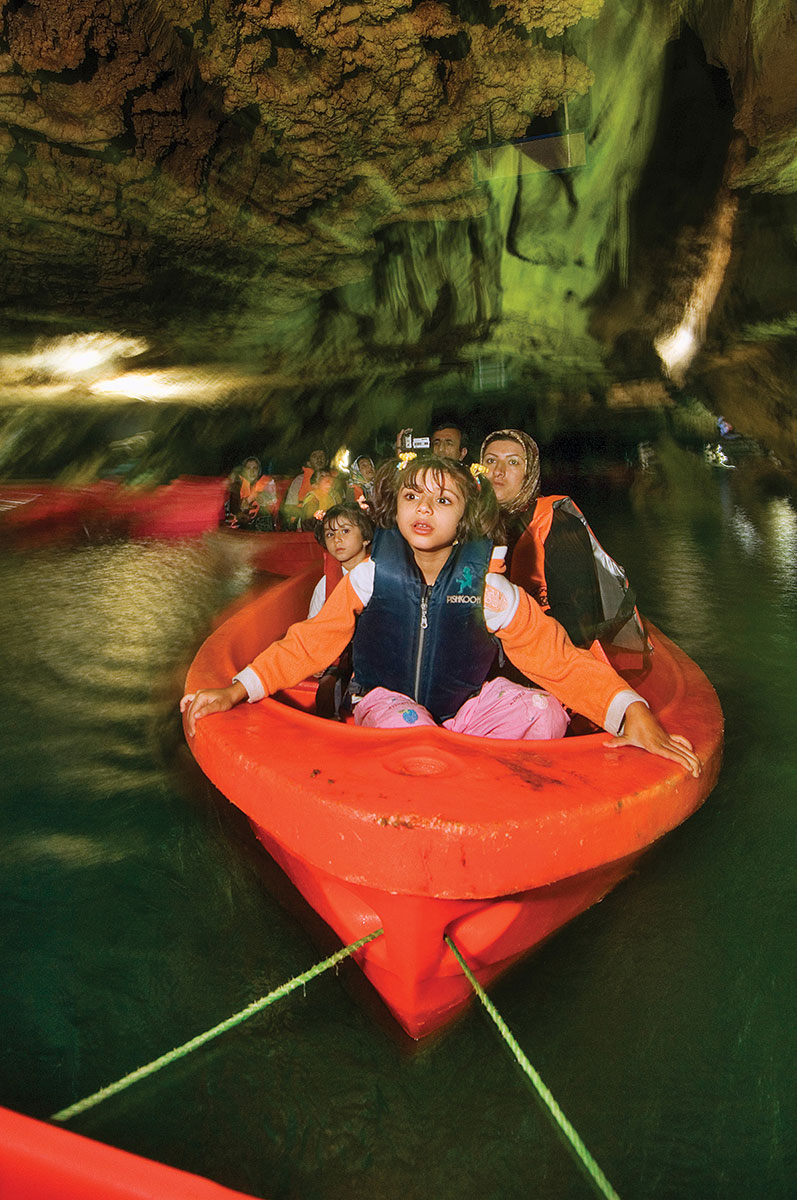
These techniques work across most scenarios. I’ve used them from the waters of Truk Lagoon, where I photographed a diver in the Micronesian surf; in a cave near Hamadan, Iran, where I documented domestic tourists, using a rear-sync flash and slow exposure to capture a feeling of movement; and to the village of Trang Bang, Vietnam, where I documented Kim Phuc holding a photo of herself created 50 years earlier by Nick Ut during the Vietnam War (above).
Regardless of the location, each photo needs to be fine-tuned when it comes to proper Kelvin color temperature balance. While the flash is consistent with its color temperature balanced to daylight, the ambient light color changes due to time of day and weather conditions. Clouds, for instance, will push everything toward the cooler, bluer side of the scale. These ambient light changes can potentially create a light imbalance where your flash-lit subject is one color temperature and the environment another, resulting in an artificial look. While Adobe Lightroom and other post-production software can isolate the subject and correct the color, in-camera balance will save time on the backend. Also, for those working in the documentary world, isolated color correction in an image is not allowed, nor is any major shift in color from the reality of the scene.
CTOs (Color Temperature Orange gels) and CTBs (Color Temperature Blue) are a must in any location lighting kit. These gels and other color-adjusting accessories are made by several companies, including camera manufacturers. Nikon makes the SJ-5 color filter set that I use with the Color Filter Holder SZ-4 for my SB-5000 Speedlight. The set includes two FL-G1 fluorescent filters, two L-G2 fluorescent filters, two TN-A1 incandescent filters, two TN-A2 incandescent filters, four types of red filters, four types of blue filters, two yellow filters, and two amber filters that all fit into a small case.
All my examples are done with one light—either a Nikon Speedlight or a Profoto strobe—while I pay careful attention to the lighting triangle of ambient light balance, color balance, and artificial light angle. For all these situations, I start with the ambient light exposure and decide if I want to balance my flash to it, overpower it, or simply fill in some shadows.
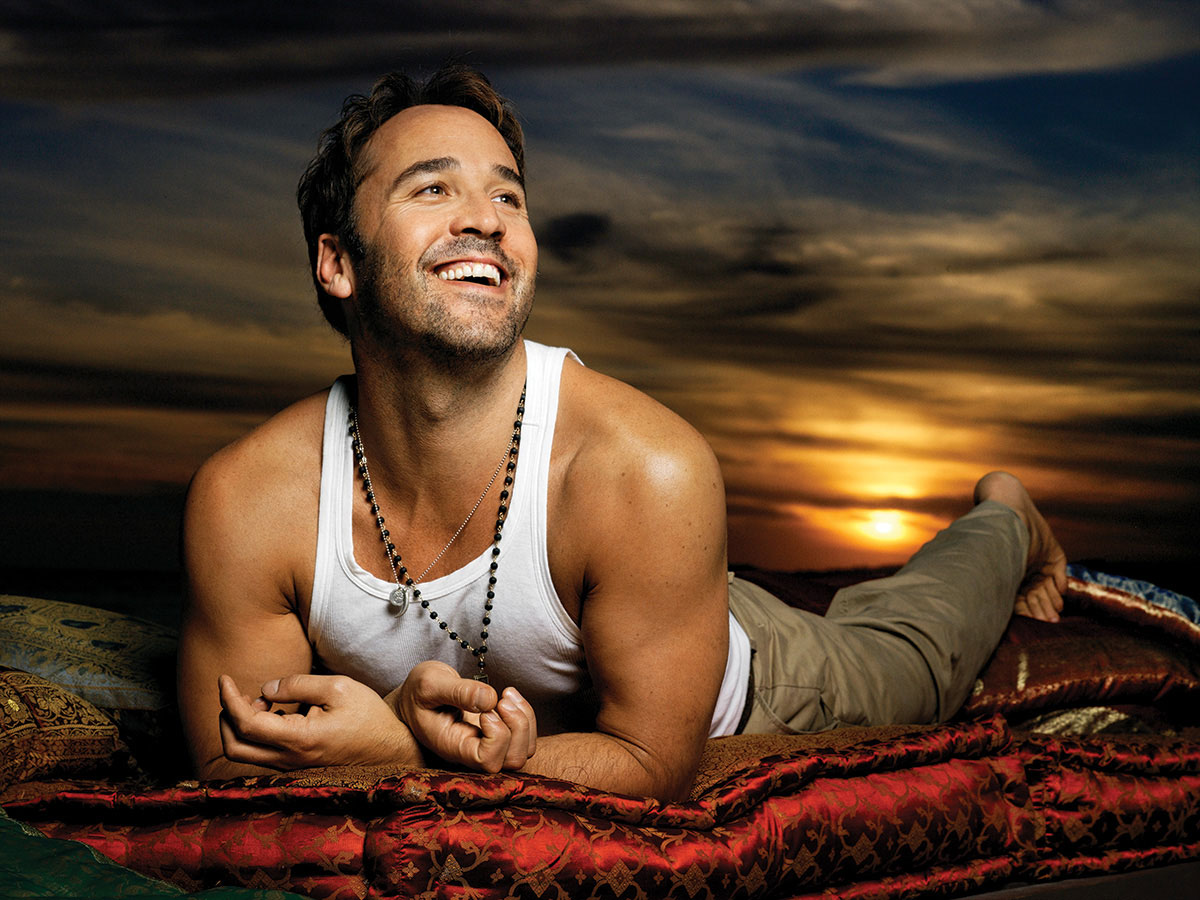
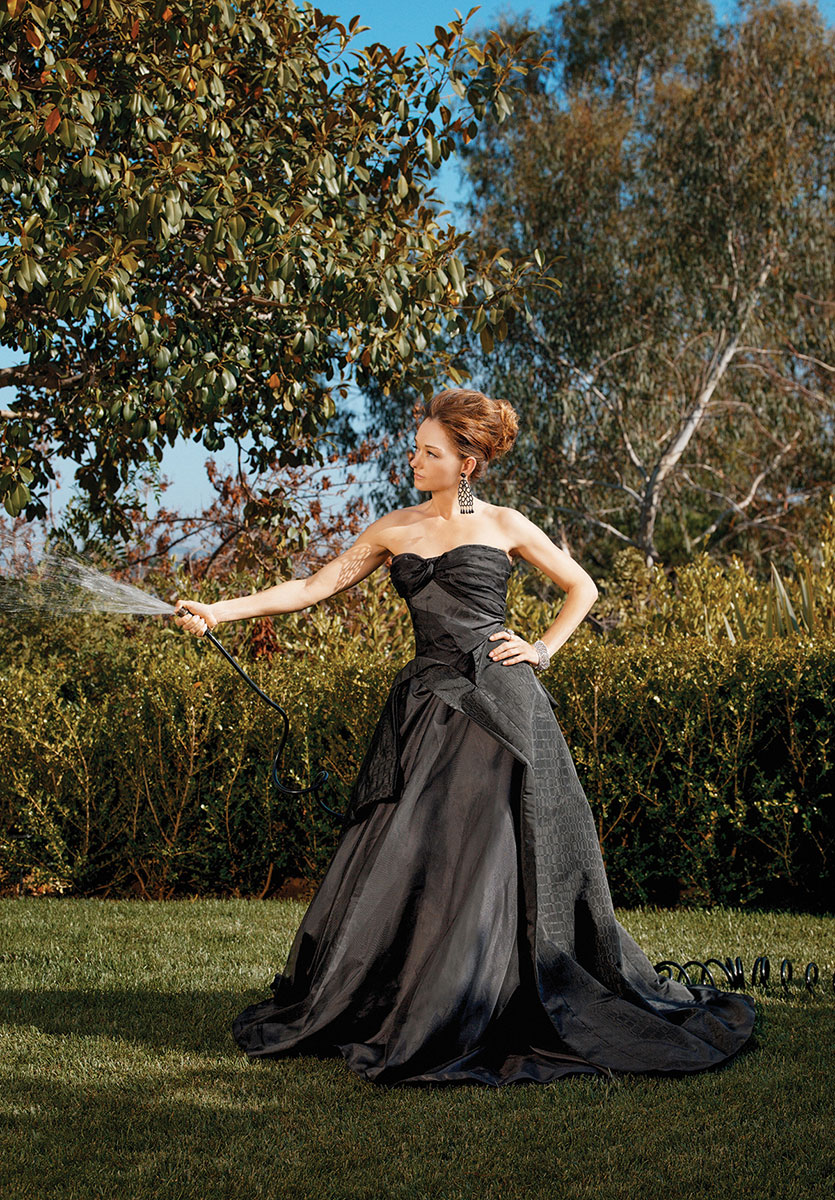
Annie Leibovitz told me years ago that she developed her signature style of over-powering the ambient light in her portraiture at the beginning of her career to make her images in Rolling Stone magazine pop, since, in the publication’s early days, they were printed on newsprint. For my photo of actor Jeremy Piven in Malibu (above), I used a Hasselblad that synced with my Profoto strobe at 1/1,000 second, f/13, ISO 100. This made the sky much darker than it was to the eye. I added a 3/4 CTO over the flash head to balance the light on Jeremy with the background. Rather than memorizing the entire Kelvin Temperature Scale, just keep in mind two numbers—5,600K for daylight and 3,200K for tungsten—and go from there. The math is simple: For instance, a full CTO will bring 5,600K to 3,200K, a 1/2 CTO will bring 5,600K to 4,400K. When using my Nikon Speedlight for on-the-run documentary photography, I use the 1/4 CTO most.
While I tend to move to my Profotos or Stella lights for bigger setups, look to Joe McNally’s Multiple Nikon Speedlight setups to see how masterfully these demure light sources can be on location.
Taking a long exposure with flash added, especially if the subject is moving, is almost always better off being exposed in the rear-curtain flash mode. This will freeze the person (or whatever moving object you’re photographing) and leave whatever movement they had before the flash went off trailing behind them like a shadow. This is especially useful when conveying movement. Since front-curtain sync is the camera’s default setting, change it to rear-curtain, also called rear-sync. I also set a slower shutter speed to allow some ambient light in before that flash goes off. While the outcome depends on the speed of the subject, a good starting point is 1/30 or 1/15 second. The ambient light before the flash helps capture the motion in the image, and the more ambient light you have, the better the motion trail will show up. If you’re working in a somewhat controlled situation, use a tripod to keep the background from looking too blurry from camera shake.
To set the rear-curtain mode on my Nikon Z8 and Z9 bodies, I press the flash button on the side of my camera and rotate the rear command dial until it shows REAR on the camera’s back LCD or top display. For my exposure settings in rear-sync, I tend to shoot in aperture priority, shutter priority, or the manual mode to have maximum control over the light in the scene. Since rear-curtain flash is not a precise science, it’s ideal to take a quick shot, analyze it, and then quickly make adjustments. That’s not always possible, so practice in advance. A wedding ceremony, for instance, is not a great time to practice new techniques. It will require experimentation to decide how much motion you want in a few images to flow seamlessly with other photos a traditional album. In terms of flash position, I prefer to hold my Speedlight in my left hand while it’s attached to my Z8 or Z9 by a SC-29 TTL Coiled Remote Cord (AWL—advanced wireless lighting—is also an option) and typically from a high angle, pointed down to emulate the direction of a real light source. I will sometimes do the same with a Profoto on a monopod rather than a stand if I’m working on my own and need to move around with a subject. I hold the Speedlight with my index finger on top so I can aim it without having to check my results each time.
Light modifiers from companies such as MagnetMod, Rogue Photographic Design, Westcott, and Gary Fong are excellent companions to have on the road to further help in flavoring each image to taste.
Mark Edward Harris is an award-winning photographer and writer based in Los Angeles.