Plan for the Extra Element
How to make cityscape and landscape photography special by scouting for that extra detail
When it comes to landscape and cityscape photography, it is perhaps better to think more and photograph less. In many ways, this is antithetical to Henri Cartier-Bresson’s “Decisive Moment” approach: part of his classic reportage methodology was taking the brain out of the equation and allowing instincts to take over.
“Thinking more,” however, does not mean we should turn off the tap to our creative souls and instincts when it comes to landscape and cityscape photography, but rather recognize that we can achieve more powerful results with planning and research. It is useful for those working across genres, such as travel photographers, to have the mental elasticity to switch back and forth between being methodical and being instinctual.
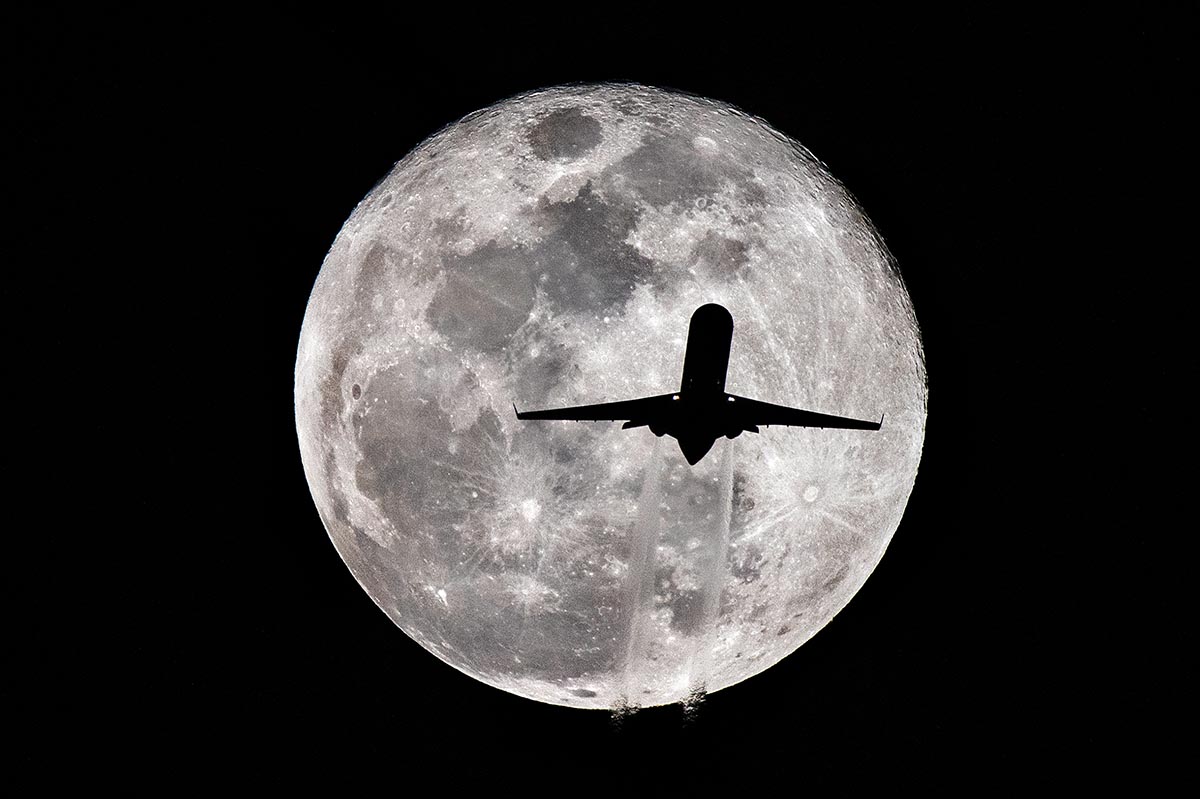
My moonscape with a plane cutting through it (top) is an example of merging two different skill sets: the quick reactions of documentary work with a classic approach to astrophotography. I was able to freeze the plane at 1/2,500 second, f/7.1, ISO 800 with my exposure set for the moon’s surface.
Ansel Adams didn’t have an app to help him get into position when he captured his historic “Moonrise, Hernandez, New Mexico” photograph in 1941 with his 8x10 camera. But present-day photographers can take advantage of this state-of-the-art technology. I solicited advice from Los Angeles Times photo editor and photographer Raul Roa, my guru when it comes to being in the right place at the right time to document the natural world and the skies above. When he takes off his photojournalism hat and dons his fine art cap, he relies on the apps PhotoPills, The Photographer’s Ephemeris, Sun Surveyor, Deluxe Moon, Planets, Sky Guide, and Light Pollution Map for most for his outdoor, cityscape, and night sky work.
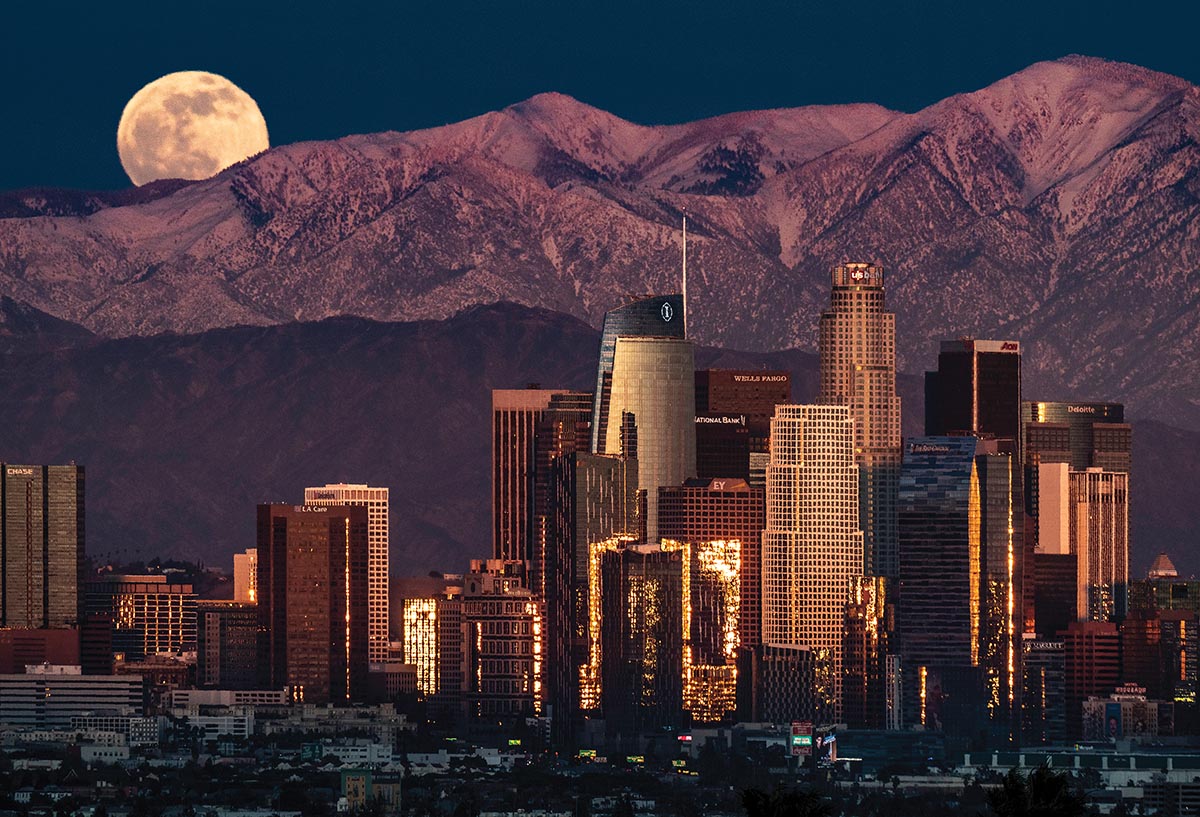
My awareness of the phases of the moon and its position made my shot, “Moonrise, Los Angeles” possible (above). My ability to scout the location well in advance aided in the success of the image, as did the wind blowing away the day’s haze. I also had a sturdy Really Right Stuff tripod, and a cable release attached to my Nikon D850 with a 500mm f/5.6 lens attached. The extra element of the moon made what would have been a nice cityscape into a more dynamic image.
I am constantly “working” a situation so various elements line up rather than jumping from one location to another. After all, what are the odds of everything coming together at the instant we show up somewhere? To aid in my planning, I mentally gauge what the view will be from a location that I can see but that I haven’t gone to yet; I call it astral projecting.
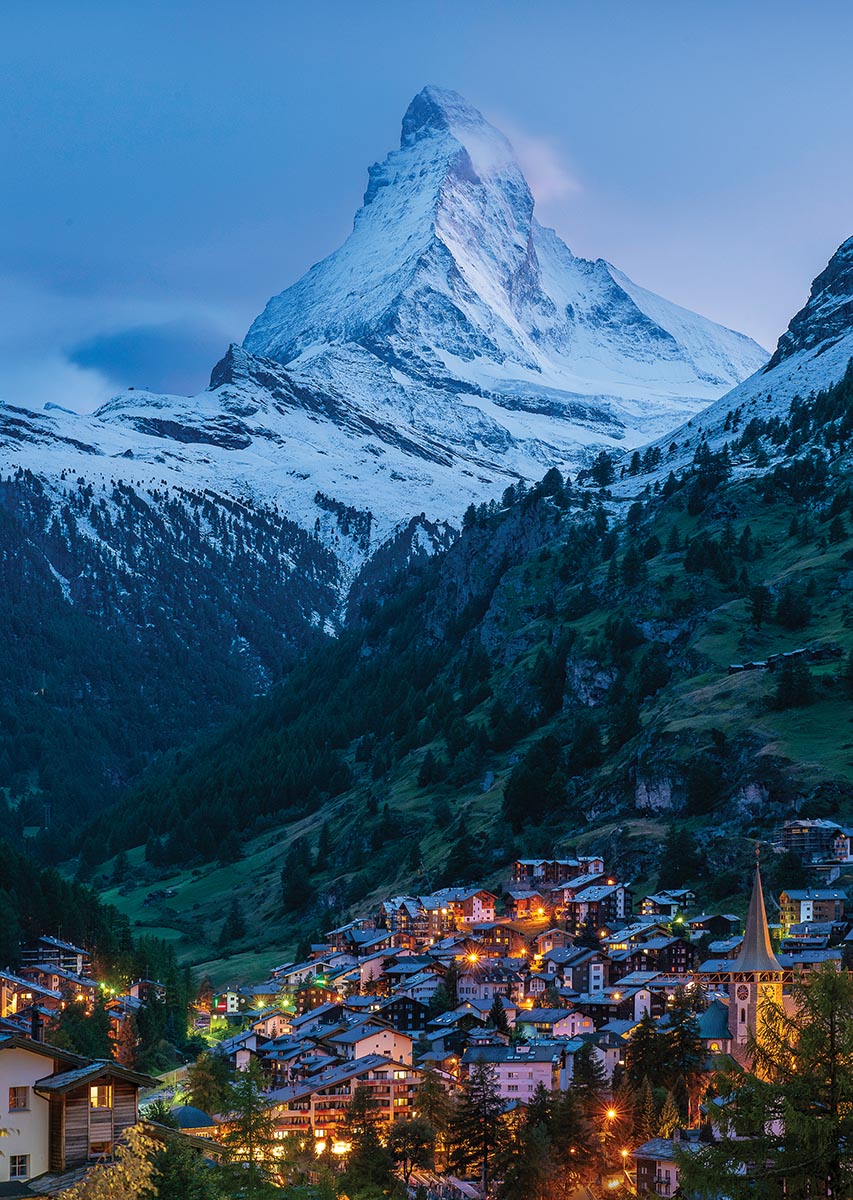
For the photograph I captured for a travel magazine of Switzerland’s Matterhorn after sunset (above), I astral-projected from the main street in Zermatt in the middle of the day up to a hotel that seemed to have a clear view of the legendary mountain with the town below. I then hiked up to the building, introduced myself to the manager, and asked if I could set up the image from the deck of one of their rooms a little before sunset. Getting access in advance meant I could capture the iconic Swiss peak when day was turning to night. Blue hour worked best to balance the ambient light in the sky with the lights of the town of Zermatt. If it had been a starry night, I could have tried to use a graduated neutral density filter, placed to graduate from the bottom of the frame up, to keep the town’s lights at bay and exposed long enough to record a dark sky. When I include stars, I prefer to keep them sharp, meaning that with a wide-angle lens, I limit my exposure to a maximum of 20 seconds to avoid star trails.

While I couldn’t turn the lights of Zermatt on and off during a long exposure, I could do it for the tent shot in Joshua Tree, California with the Milky Way overhead (above). During that exposure, I had a friend quickly turn on and off a daylight balanced light with a CTO (color temperature orange) gel on it. Some photographers will do two exposures and combine them later, but I prefer to do everything in-camera in a single frame. A solid carbon fiber tripod with a ballhead and my Nikon Z 8 or Z 9 camera body with an L-bracket are always part of this type of image. The dedicated L-bracket ensures there will be no gravitational pull toward terra firma for verticals during a long exposure.
Making a living in other genres of photography, such as portraits or weddings, doesn’t mean we can’t enjoy or produce work in other forms, including landscape and nature photography. For example, wedding photographers get stunning images when they take advantage of beautiful landscapes, cityscapes, and a venue’s architectural features. While there is overlap in the tools of the trade across photographic genres, you may want to consider some more genre-specific equipment to branch into nature photography. This includes sturdy tripods, neutral density filters, polarizers, and hiking boots.
To get the most out of a landscape or cityscape, I carry several filters. For a scene with dramatic clouds, I often turn to my polarizers: a Master HTC-Pol Käsemann 82mm for a Nikkor Z 24-70mm f/2.8 and a Master HTC-Pol Käsemann 112mm for my Nikkor Z 14-24mm f/2.8. In addition to their high-quality glass, they are both extremely durable due to their brass mounts. If water is going to be in the frame—such as a waterfall, an ocean, or a lake—I’ll often put either my 6-stop B+W MRC Nano Master #806h ND filter or a 10-stop B+W MRC Nano Master #810 ND filter to work. I prefer using fixed-f/stop ND filters rather than variable NDs, which can produce dark corners when pushed to their range limit on long exposures.
Even though these days I am working exclusively with mirrorless cameras, Nikon’s Z 8 and Z 9 bodies, and the Leica Q2 Monochrom, I continue to use a cable release, a remote, or a self-timer when my camera is locked down on a tripod so I can record a scene in the great outdoors with a long exposure. The movement created by the depression of the shutter-release button can cause camera shake on shorter, long-exposure images. While the resulting tack-sharp 35mm frames might not gain me access to Group f/64, I can still incorporate some of their classic techniques to record the timeless beauty of our shared planet.
Mark Edward Harris is an award-winning photographer and writer based in Los Angeles.