Calibrate for Consistency
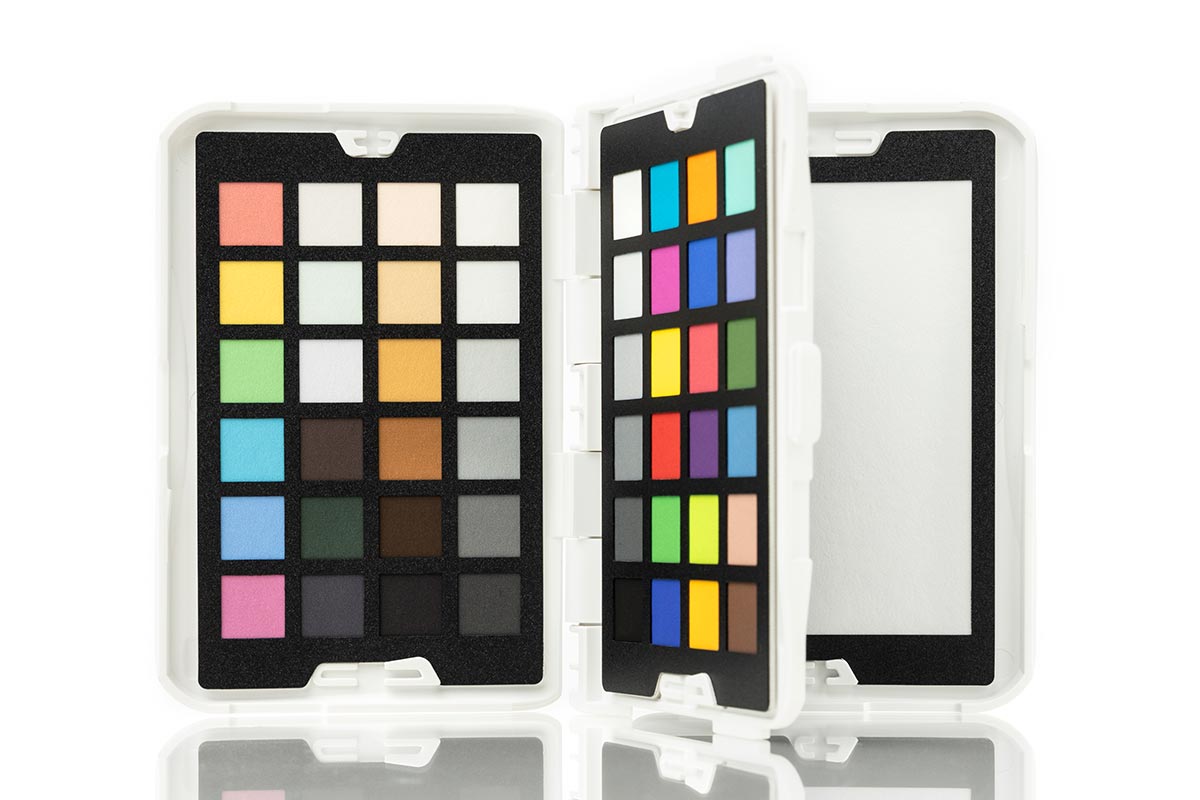
The new Spyder Checkr Photo from Datacolor puts color and white balance charts in a compact format.
9.9.2022
Color management of monitors, scanners, and printers plays an important role in the lives of digital photographers. Studio photographers have been able to easily integrate camera-based color management with the use of the SpyderCheckr or SpyderCheckr 24 color targets. But due to their large size, these tools are not very practical for fashion, travel, wedding, sports, event, and portrait photographers working on location. Datacolor has now come up with something more fitting, the Spyder Checkr Photo.
Why bother color managing your camera/lens system? As advanced as modern camera sensors are, they still only respond to luminance data, relying on a filter array and processing algorithms to produce a color representation of the scene. While you may achieve a reasonable white balance, there’s no guarantee that other colors will reproduce accurately. The generated image varies from camera to camera and from one camera manufacturer to another and from one lighting situation to another. By color managing your camera(s) and those of others photographing the same event, wedding, etc., you eliminate these variables.

Spyder Checkr Photo held for scale. With most lenses, it’s easiest to hold the Spyder Checkr Photo in your hand. It isn’t necessary for the patches be in perfect focus.
The Spyder Checkr Photo includes both hardware and software components. The hardware is a passport-size case with color and white balance charts inside. The software consists of a standalone application and a plug-in for Adobe Lightroom, Adobe Camera Raw (ACR), and Hasselblad Phocus.
The Spyder Checkr Photo hardware is straightforward to use. Once on location under the appropriate lighting conditions, you open the case, position it, or simply hold it so that it fills about 1/3 of the center of your frame, and capture a raw image. Ideally the lighting is even across the color cards and the device is square on to the sensor, but precision is not really that essential. I found that in reality this needs to be done just once for a particular camera and lens system. However, it’s so quick and easy, it can be of value to repeat it when lighting conditions change drastically. Once done, go on with your shooting.
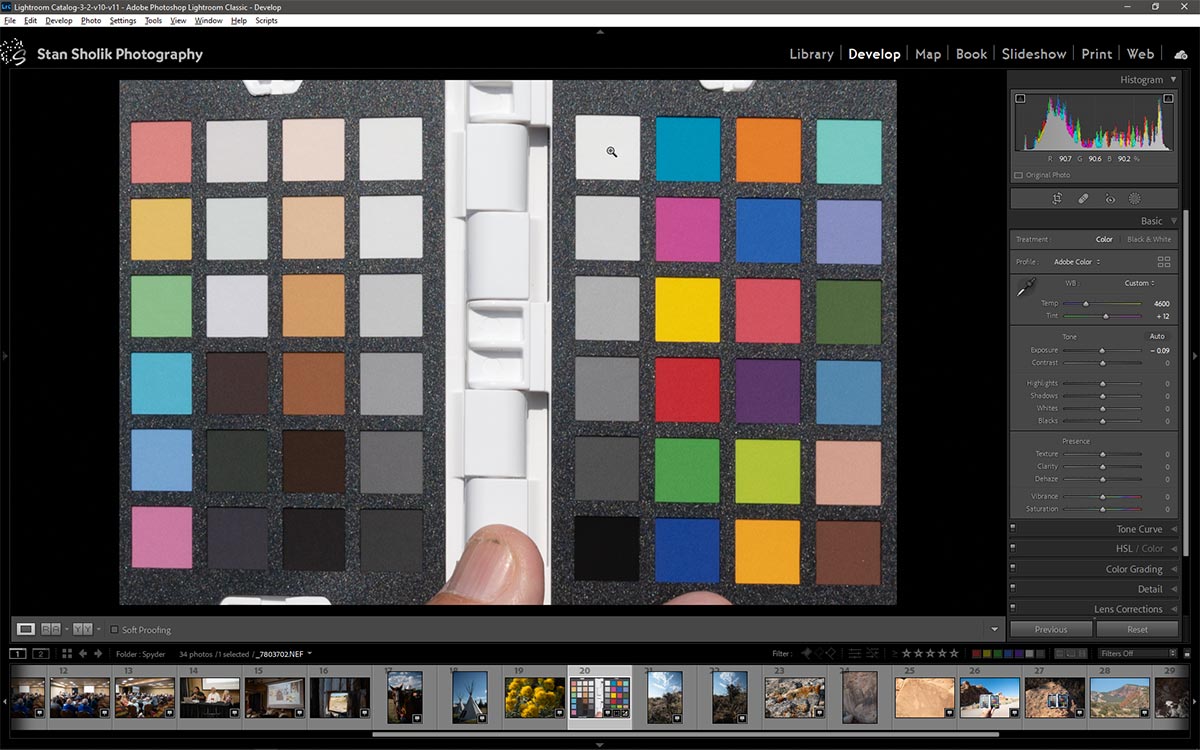
The cropped and corrected Spyder Photo in Lightroom ready for export into the Datacolor software.
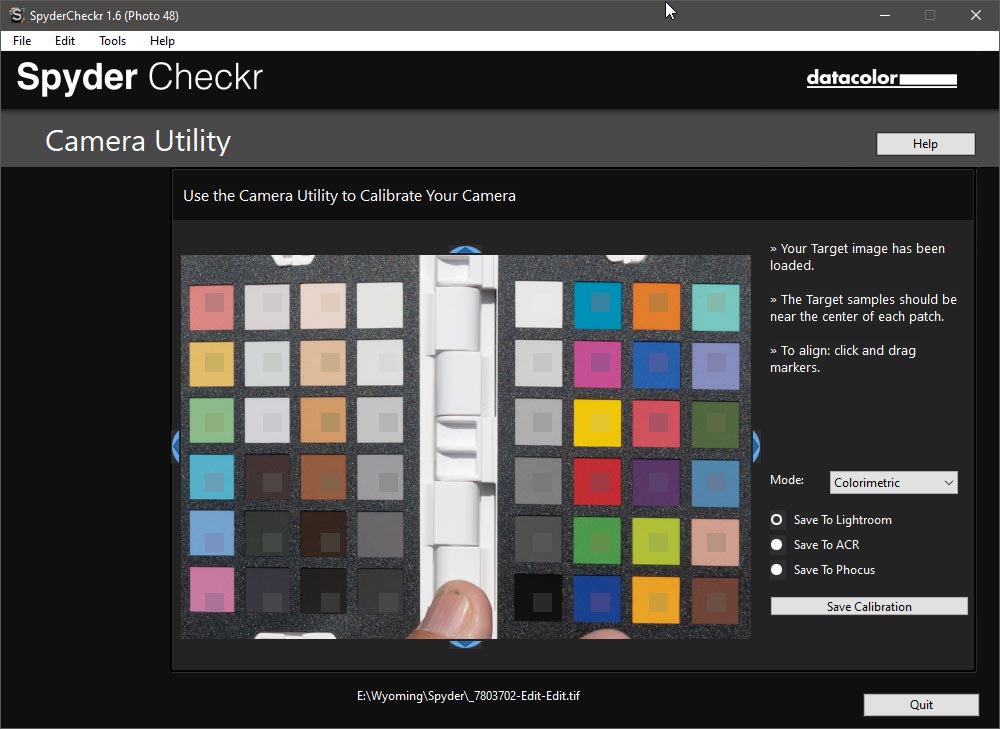
After moving the corrected image into the Datacolor software, you adjust the reference patches to approximately center the patches of the corrected image. Once done, you choose a rendering mode, where to send the calibration, and a name for it.
When you’re back at your computer, open the image of the Spyder Photo cards in your raw processing software, straighten, apply lens corrections if appropriate, and crop the image to the edges of the cards. Then you click the second gray square on the right side to achieve white balance. Next you use the exposure slider to adjust the top whitest square to approximately 230 or 90% and the blacks slide to adjust the blackest square to approximately 10 or 5%.
With the Spyder Photo image properly adjusted, you export a TIFF and launch the Spyder Checkr software that you’ve downloaded, installed, and activated. Check that it’s set to 48 Patch Spyder Checkr Photo. You can drag and drop the TIFF into the software or open it with File > Open. If you use Lightroom, Camera Raw, or Phocus as your raw image processor, you can set up an “Edit in …” to move the adjusted file to the Datacolor software.
In the software, the TIFF appears below a standardized target of 48 patches. If the patches and your import don’t align perfectly, you can click on triangles at each edge and adjust the alignment. Before saving the calibration, you select an appropriate mode: colorimetric for the most accurate; saturation for most general photography; or, portrait to slightly desaturate the skin tones for portrait subjects. Then you name and save the calibration. The software saves the calibration to the appropriate folder in Lightroom, ACR, or Phocus.

The calibration adjustments created by Spyder Photo are visible in the Hue sliders of the HSL tab in Lightroom.
At this point, you must relaunch the raw processing software so that the calibration will appear as a preset. You apply your preset to other images from the User Presets list in the Develop module of Lightroom; or from Load Settings in the dropdown menu to the right of the mode name (Basic, etc.) in ACR; or from the Adjust: Color Correction dropdown menu in Phocus. For ACR, you can also apply settings to multiple images in Adobe Bridge.
You can view the Spyder Checkr Photo adjustments in the Hue area of the Hue, Saturation, and Brightness sliders in Adobe software, or the Adjust: Color Correction section of Phocus. These tools can also be used to make small adjustments to tweak the profile.
In general, I found that using the camera profiles I created resulted in subtle, but often noticeable, adjustments to colors and saturation in the image. For example, I have always felt that blue skies captured by my Nikons are more cyan than I like, and warm colors tend to be over saturated. By applying Spyder Photo adjustments, both issues are resolved to my satisfaction.
There are times when the situation on location doesn’t offer an obvious area that the camera can use to accurately white balance a set of images. On those occasions, the Spyder Checkr Photo is invaluable. A second set of cards with grayscale patches allows you to create a custom white balance using your camera.
While the adjustments created by the Spyder Checkr Photo are subtle, by using the adjustments you have a consistent baseline of color correction from which to make specific changes to your images. I can also see its value when there are multiple photographers covering a wedding or event when it’s important to have a consistent look to the final images. If you see yourself in these circumstances, the Datacolor Spyder Checkr Photo is available for a list price of $99.99.
Stan Sholik is a writer and photographer in San Clemente, California.

Under fluorescent lighting, the calibration adjustment did a good job correcting the color and contrast of the original (above) to the final (below).

Corrected final

Using the Portrait mode, the calibration adjustments to the original capture (left) lightened the skin tone and lowered the overall contrast as well as correcting the blue in the sky of the final (right).

Corrected final

The oversaturated and orangish colors of the flowers in the original (above) were corrected to a more accurate rendition by the calibration (below).

Corrected final

The oversaturated colors of the lichens in the original (above) were corrected to a more accurate rendition by the calibration (below).

Corrected final

The colors, contrast, and saturation of the rocks in Kodachrome Basin, Utah, were subtly corrected from the original (above) to the final (below).

Corrected final

The overly saturated red of the rock and the slightly cyan sky in the original (above) at Kodachrome Basin Utah were correctly adjusted by the calibration in the final (below).

Corrected Final

The Spyder Photo calibration applied to the original photo of Grosvenor Arch in Utah (above) yielded a more accurate rendering in the rocks and the sky in the final image (below).

Corrected final